
Mattermost是Slack和Microsoft Teams的开源替代方案。它允许你自托管在线聊天服务,提供文件共享、搜索、自动化以及大量第三方集成等功能。
Mattermost是专为组织和企业设计的协作平台,将消息系统、自动化、集成和安全性结合在一起,服务于关键工作流。
本教程将指导你在Debian 12服务器上安装Mattermost。你将使用PostgreSQL作为数据库,Nginx作为反向代理,并通过SSL证书保护Mattermost的安全。
前提条件
开始本教程前,请确保你已经具备以下条件:
- Debian 12服务器
- 具有管理员权限的非root用户
- 已配置并指向服务器IP地址的域名
安装依赖包
在安装Mattermost之前,你需要先安装其依赖包,包括PostgreSQL数据库服务器、Nginx Web服务器和Certbot。
首先,运行以下命令更新Debian软件包索引:
sudo apt update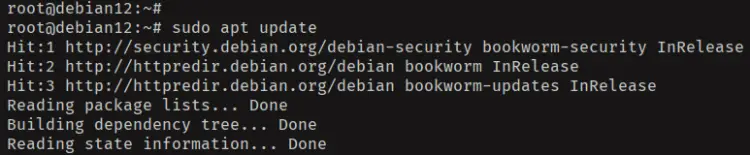
现在使用以下apt命令安装PostgreSQL、Nginx、Certbot、Gnupg和curl等依赖包。输入Y确认安装:
sudo apt install postgresql postgresql-contrib nginx certbot gnupg curl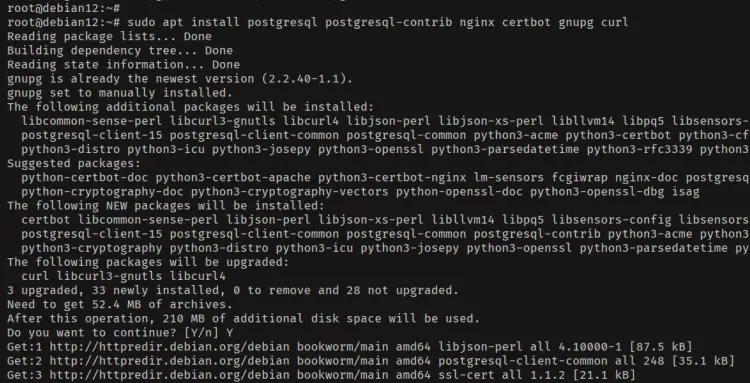
安装完成后,使用systemctl命令检查PostgreSQL服务状态。你将看到PostgreSQL已在系统上运行:
sudo systemctl is-enabled postgresql
sudo systemctl status PostgreSQL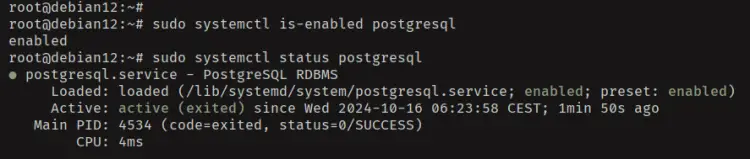
最后,使用以下命令检查Nginx服务状态。Nginx服务应该已在你的Debian系统上正常运行:
sudo systemctl is-enabled nginx
sudo systemctl status nginx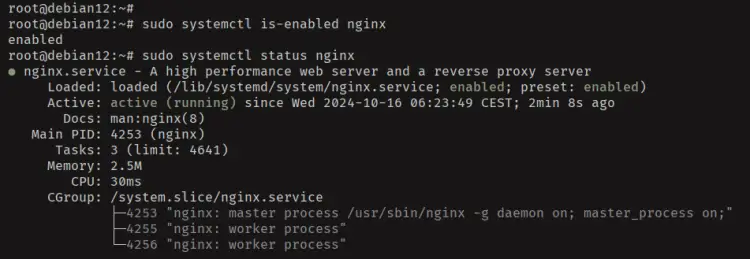
配置PostgreSQL用户和数据库
依赖包安装完成后,你将为Mattermost创建新的数据库和用户。你将使用PostgreSQL内置的psql命令行工具来完成此操作。
使用以下命令登录PostgreSQL:
sudo -u postgres psql现在运行以下SQL查询来创建新的数据库和用户mattermost,并设置密码为password:
CREATE DATABASE mattermost;
CREATE USER mmuser WITH PASSWORD 'password';
GRANT ALL ON DATABASE mattermost TO mmuser;
ALTER DATABASE mattermost OWNER TO mmuser;
GRANT USAGE, CREATE ON SCHEMA PUBLIC TO mmuser;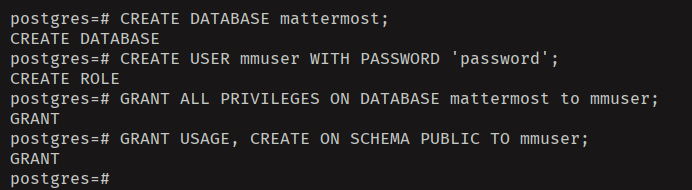
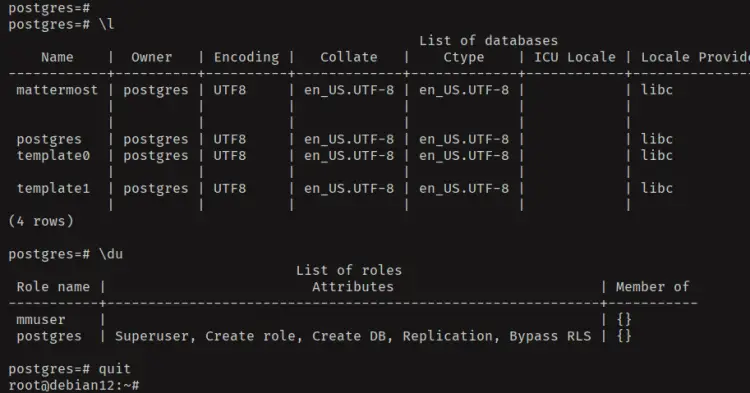
接下来,使用以下命令查看PostgreSQL服务器中的数据库和用户列表:
\l
\du
你将看到创建的mattermost数据库和用户。输入quit退出psql命令行。
创建新的PostgreSQL用户和数据库后,你需要验证PostgreSQL用户能否成功登录PostgreSQL服务器。
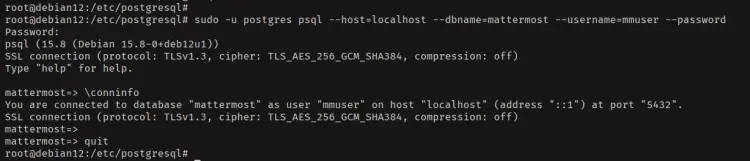
运行以下psql命令以mmuser用户登录PostgreSQL服务器,提示时输入密码:
sudo -u postgres psql --host=localhost --dbname=mattermost --username=mmuser --password登录成功后,使用以下查询检查连接状态:
\conninfo你将看到如下PostgreSQL连接状态信息:
安装Mattermost
此时,你的服务器已经准备好安装Mattermost。现在你将下载Mattermost源代码、设置安装目录、配置PostgreSQL连接、设置域名,然后配置正确的目录权限和所有权。
在下载Mattermost之前,添加新的系统用户mattermost:
sudo useradd --system --user-group mattermost现在使用wget命令下载Mattermost,并使用tar命令解压。Mattermost服务器将在mattermost目录中:
wget https://releases.mattermost.com/10.0.1/mattermost-10.0.1-linux-amd64.tar.gz
tar -xf mattermost-10.0.1-linux-amd64.tar.gz
接下来,将mattermost目录移动到/opt,这样Mattermost的安装目录将位于/opt/mattermost:
mv mattermost /opt/然后创建新的数据目录/opt/mattermost/data,用于存储用户数据:
sudo mkdir -p /opt/mattermost/data接下来,使用nano编辑器打开默认的Mattermost配置文件/opt/mattermost/config/config.json:
sudo nano /opt/mattermost/config/config.json将SiteURL修改为你的域名,例如https://mattermost.example.com:
"ServiceSettings": {
 "SiteURL": "https://mattermost.example.com",
在SqlSettings和DataSource部分,将数据库凭据修改为你的配置:
"SqlSettings": {
 "DriverName": "postgres",
 "DataSource": "postgres://mmuser:password@localhost/mattermost?sslmode=disable&connect_timeout=10&binary_parameters=yes",
保存文件并退出编辑器。
最后,运行以下命令将/opt/mattermost目录的所有权更改为mattermost用户,并确保mattermost组对/opt/mattermost目录具有写入权限:
sudo chown -R mattermost:mattermost /opt/mattermost
sudo chmod -R g+w /opt/mattermost
创建Mattermost systemd服务
在这一步,你将为Mattermost创建新的systemd服务文件。这样Mattermost将在后台运行,你可以通过systemctl实用程序轻松管理Mattermost进程。
使用nano编辑器创建新的systemd服务文件/etc/systemd/system/mattermost.service:
sudo nano /etc/systemd/system/mattermost.service将以下配置内容插入文件:
[Unit]
Description=Mattermost
After=network.target
After=postgresql.service
BindsTo=postgresql.service

[Service]
Type=notify
ExecStart=/opt/mattermost/bin/mattermost
TimeoutStartSec=3600
KillMode=mixed
Restart=always
RestartSec=10
WorkingDirectory=/opt/mattermost
User=mattermost
Group=mattermost
LimitNOFILE=49152

[Install]
WantedBy=multi-user.target
保存文件并退出编辑器。
运行以下命令重新加载systemd管理器:
sudo systemctl daemon-reload最后,启动、启用并验证mattermost服务:
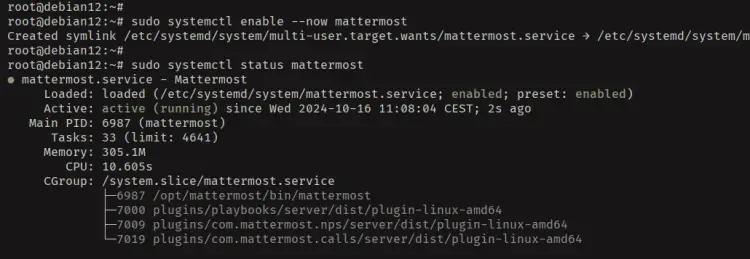
sudo systemctl enable --now mattermost
sudo systemctl status mattermost
如下所示,mattermost服务已正常运行并已启用:
配置Nginx反向代理
此时,Mattermost已在你的Debian 12服务器上运行。在这一部分,你将从Let's Encrypt生成SSL证书,然后创建新的Nginx服务器块作为Mattermost的反向代理。
在配置Nginx之前,运行以下命令停止Nginx服务并为Mattermost生成SSL证书。确保将域名和电子邮件地址替换为你自己的信息:
sudo systemctl stop nginx
sudo certbot --certonly --standalone --agree-tos --no-eff-email --staple-ocsp --preferred-challenges http -m [email protected] -d mattermost.example.com
过程完成后,你的SSL证书将位于/etc/letsencrypt/live/mattermost.example.com目录。
接下来,使用nano编辑器打开默认的Nginx配置文件/etc/nginx/nginx.conf:
sudo nano /etc/nginx/nginx.conf在文件中添加以下配置:
server_names_hash_bucket_size 64;
include /etc/nginx/conf.d/*.conf;
保存并退出文件。
现在使用nano编辑器创建新的Nginx服务器块配置/etc/nginx/sites-available/mattermost:
sudo nano /etc/nginx/sites-available/mattermost插入以下配置,确保将server_name修改为你的域名,并调整SSL证书路径:
upstream backend {
server 127.0.0.1:8065;
keepalive 32;
}

server {
listen 80;
server_name mattermost.example.com;
return 301 https://$server_name$request_uri;
}

server {
listen 443 ssl http2;
listen [::]:443 ssl http2;
server_name mattermost.example.com;

http2_push_preload on;

ssl_certificate /etc/letsencrypt/live/mattermost.example.com/fullchain.pem;
ssl_certificate_key /etc/letsencrypt/live/mattermost.example.com/privkey.pem;
ssl_session_timeout 1d;

ssl_protocols TLSv1.2 TLSv1.3;

ssl_early_data on;

ssl_ciphers 'ECDHE-ECDSA-AES256-GCM-SHA384:ECDHE-RSA-AES256-GCM-SHA384:ECDHE-ECDSA-CHACHA20-POLY1305:ECDHE-RSA-CHACHA20-POLY1305:ECDHE-ECDSA-AES256-SHA384:ECDHE-RSA-AES256-SHA384';
ssl_prefer_server_ciphers on;
ssl_session_cache shared:SSL:50m;
add_header Strict-Transport-Security max-age=15768000;
ssl_stapling on;
ssl_stapling_verify on;

add_header X-Early-Data $tls1_3_early_data;

location ~ /api/v[0-9]+/(users/)?websocket$ {
proxy_set_header Upgrade $http_upgrade;
proxy_set_header Connection "upgrade";
client_max_body_size 50M;
proxy_set_header Host $host;
proxy_set_header X-Real-IP $remote_addr;
proxy_set_header X-Forwarded-For $proxy_add_x_forwarded_for;
proxy_set_header X-Forwarded-Proto $scheme;
proxy_set_header X-Frame-Options SAMEORIGIN;
proxy_buffers 256 16k;
proxy_buffer_size 16k;
client_body_timeout 60s;
send_timeout 300s;
lingering_timeout 5s;
proxy_connect_timeout 90s;
proxy_send_timeout 300s;
proxy_read_timeout 90s;
proxy_http_version 1.1;
proxy_pass http://backend;
}

location / {
client_max_body_size 100M;
proxy_set_header Connection "";
proxy_set_header Host $host;
proxy_set_header X-Real-IP $remote_addr;
proxy_set_header X-Forwarded-For $proxy_add_x_forwarded_for;
proxy_set_header X-Forwarded-Proto $scheme;
proxy_set_header X-Frame-Options SAMEORIGIN;
proxy_buffers 256 16k;
proxy_buffer_size 16k;
proxy_read_timeout 600s;
proxy_http_version 1.1;
proxy_pass http://backend;
}
}
完成后,保存文件并退出编辑器。
激活Mattermost的Nginx服务器块并验证Nginx配置语法。如果配置正确,你将看到输出syntax is ok - test is successful:
sudo ln -s /etc/nginx/sites-available/mattermost /etc/nginx/sites-enabled/
sudo nginx -t
最后,运行以下systemctl命令重启Nginx服务以应用更改。这样Mattermost将通过Nginx反向代理运行:
sudo systemctl restart nginx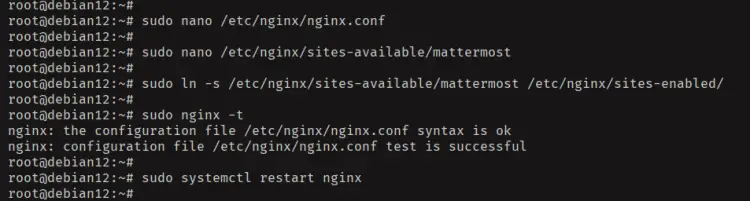
创建第一个工作空间
打开你的Web浏览器并访问https://mattermost.example.com。如果安装成功,你将被要求创建新的Mattermost管理员账户。
输入新的管理员用户名、电子邮件和密码,然后点击Create Account。

输入你的组织名称并点击Continue。

根据需要选择GitHub、GitLab、Jira或Zoom集成,然后再次点击Continue。

点击Finish setup完成配置。

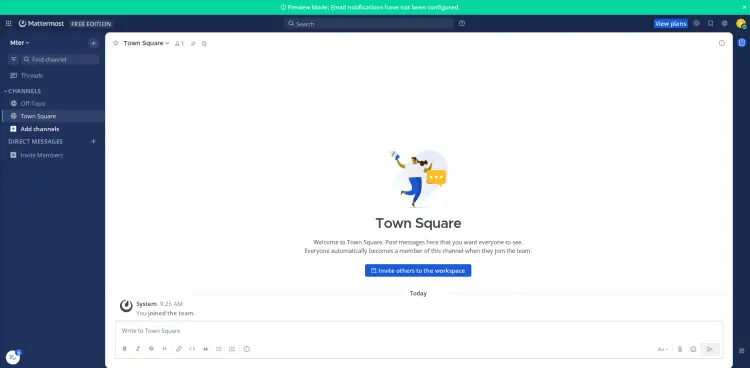
过程完成后,你将看到如下Mattermost仪表盘:
总结
恭喜!你已经完成了在Debian 12服务器上安装Mattermost。Mattermost已使用PostgreSQL作为数据库、Nginx作为反向代理正常运行,并通过Certbot和Let's Encrypt配置了HTTPS安全连接。接下来,你可能需要为Mattermost添加SMTP服务器以启用邮件通知功能。此外,你还可以将Mattermost与第三方应用程序进行集成。