
本页内容
- 前置条件
- 启用 EPEL 与 CRB(CodeReady Build)仓库
- 在 AlmaLinux 上安装 Nagios
- 配置 Nagios 监控
- 配置 Firewalld
- 登录 Nagios 监控
- 总结
Nagios 是一个用于服务器、网络和应用程序的开源监控系统。它还通过实时跟踪 IT 基础设施来提供主动的问题解决方案。Nagios 监控服务器和网络应用程序的健康状况与性能。
在本指南中,我们将向您展示如何在 AlmaLinux 9 服务器上安装 Nagios 监控工具。您将通过 EPEL 安装 Nagios,这使得 Nagios 软件包的安装变得简单。
前置条件
在开始之前,请确保您具备以下条件:
- 一台 AlmaLinxu 9 服务器。
- 一个具有 sudo 权限的非 root 用户。
- SELinux 处于 permissive 状态。
启用 EPEL 与 CRB(CodeReady Build)仓库
在安装 Nagios 之前,您必须在 AlmaLinux 服务器上添加 EPEL 仓库并启用 Code Ready Build (CRB)。这是因为 Nagios 软件包仅在 EPEL 中提供,而 Nagios 的一些 perl 软件包依赖项可在 CRB 仓库中获取。
首先,执行以下命令在您的 AlamaLinux 服务器上启用 CRB 仓库。
sudo dnf config-manager --set-enabled crb其次,执行以下命令将 EPEL 仓库添加到您的系统。
sudo dnf install epel-release最后,使用以下命令刷新 AlmaLinux 上可用的仓库。
sudo dnf makecache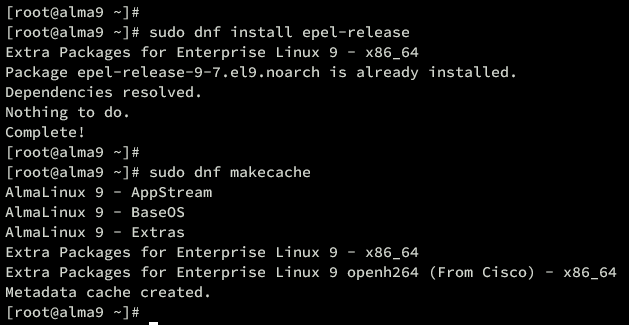
在 AlmaLinux 上安装 Nagios
在添加了 EPEL 和 CRB 仓库之后,您现在可以在 AlmaLinux 服务器上安装 Nagios。您可以手动编译它,但为了更快部署,您将通过 EPEL 安装 Nagios。
执行以下 dnf 命令,将 Nagios、Nagios Plugin 和 Nagios NRPE 插件安装到您的 AlmaLinux。输入 y 以继续安装。
sudo dnf install nagios nagios-common nagios-plugins nagios-plugins-all nrpe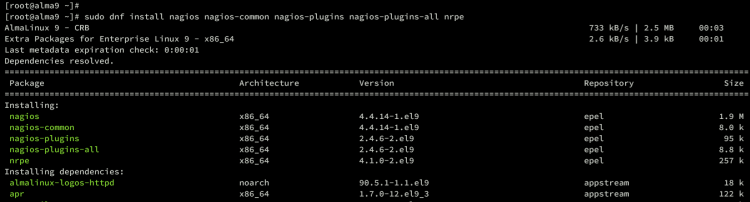
安装完成后,使用以下命令启动并设置 Nagios 服务开机自启。
sudo systemctl start nagios
sudo systemctl enable nagios
然后,验证 Nagios 服务以确保其正在运行。
sudo systemctl status nagios下方您可以看到 nagios 服务在 AlmaLinux 服务器上运行。
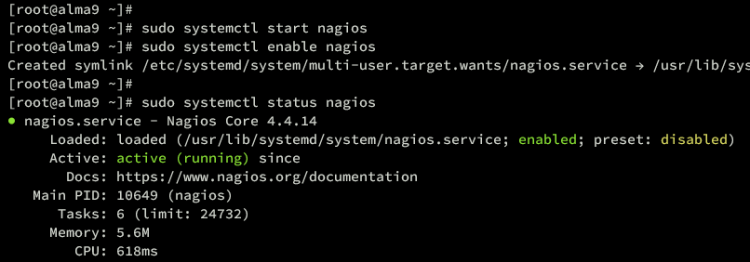
接下来,执行以下命令启动并设置 httpd 服务开机自启。
sudo systemctl start httpd
sudo systemctl enable httpd
启动后,使用以下命令验证 httpd 服务。
sudo systemctl status httpd确保 httpd 服务状态如下所示正在运行:
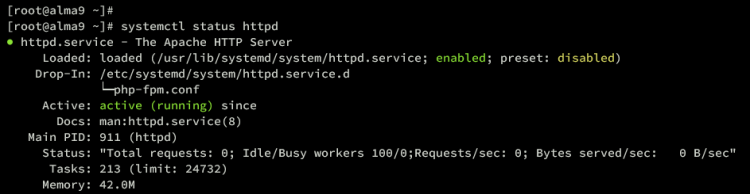
配置 Nagios 监控
现在已经安装好 Nagis,下一步是通过设置身份验证、更改 nagiosadmin 的默认密码以及验证 httpd 配置来配置您的 Nagios 安装。
在此之前,您必须了解以下一些与 Nagios 相关的配置文件和目录:
- /etc/nagios : Nagios 的主配置目录。
- /etc/httpd/conf.d/nagios.conf : Nagios 与 httpd Web 服务器之间集成的主配置文件。
- /etc/nagios/nagios.con f: Nagios 配置文件。
- /etc/nagios/cgi.cfg : Nagios Web 应用程序的主配置文件,该应用程序运行在 CGI 下。
- /etc/nagios/passwd : Nagios 身份验证的默认密码文件。基于 Apache/httpd basic_auth 模块。
执行以下 nano 编辑器命令,打开 Nagios CGI 配置文件 /etc/nagios/cgi.cfg 。
sudo nano /etc/nagios/cgi.cfg找到 use_authentication 选项,确保其已启用,值为 1 。
# AUTHENTICATION USAGE
# This option controls whether or not the CGIs will use any
# Authentication when displaying host and service information, as
# well as committing commands to Nagios for processing.
#
# Read the HTML documentation to learn how the authorization works!
#
# NOTE: It is a really *bad* idea to disable authorization, unless
# You plan on removing the command CGI (cmd. cgi)! Failure to do
# so will leave you wide open to kiddies messing with Nagios and
# possibly hitting you with a denial of service attack by filling up
# your drive by continuously writing to your command file!
#
# Setting this value to 0 will cause the CGIs to *not* use
# authentication (bad idea), while any other value will make them
# use the authentication functions (the default).
use_authentication=1
保存文件并退出编辑器。
运行以下命令重启 nagios 服务并应用您的更改。
sudo systemctl restart nagios接下来,执行以下命令以确保 httpd 上的 cgi 和 rewrite 模块已启用。
sudo httpd -M | grep 'cgi\|rewrite'如果已启用,您将看到类似如下的输出:
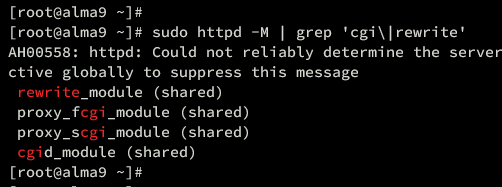
最后,您现在可以使用以下 htpasswd 命令更新 nagiosadmin 的默认密码。输入您的新密码并重复。使用 -B 参数,您将使用 bcrypt 而非 MD5。
htpasswd -B /etc/nagios/passwd nagiosadmin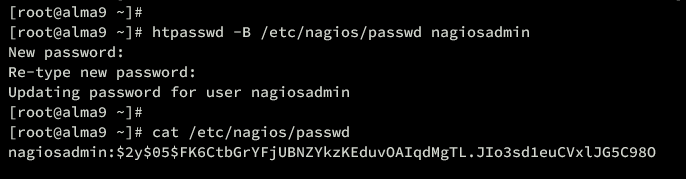
配置 Firewalld
既然您已经配置好 Nagios,在下一部分中,您必须在 firewalld 中开放 HTTP 端口。
执行以下命令在 firewalld 中启用 http 服务。
sudo firewall-cmd --add-service=http --permanent现在重新加载 firewalld 以使您的修改生效。
sudo firewall-cmd --reload最后,执行以下命令验证 firewalld 中已启用的规则列表。确保您的 firewalld 规则中已启用 http 服务。
sudo firewall-cmd --list-all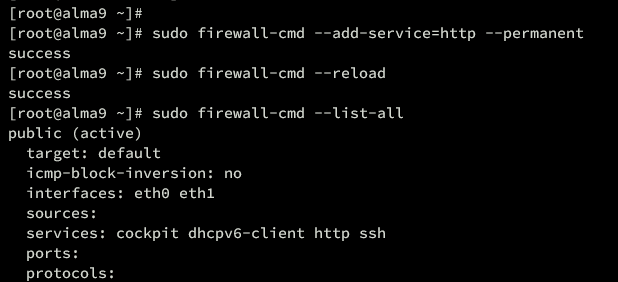
登录 Nagios 监控
至此,您已完成并配置好了 Nagios 安装。在下一步中,您将通过 Web 浏览器访问来验证您的安装。
在您的本地计算机上,打开 Web 浏览器并访问服务器 IP 地址加上 /nagios 路径( http://192.168.5.50/nagios )。当提示进行身份验证时,输入默认用户 Nagios admin 并输入您的密码,然后单击 Sign In 确认。
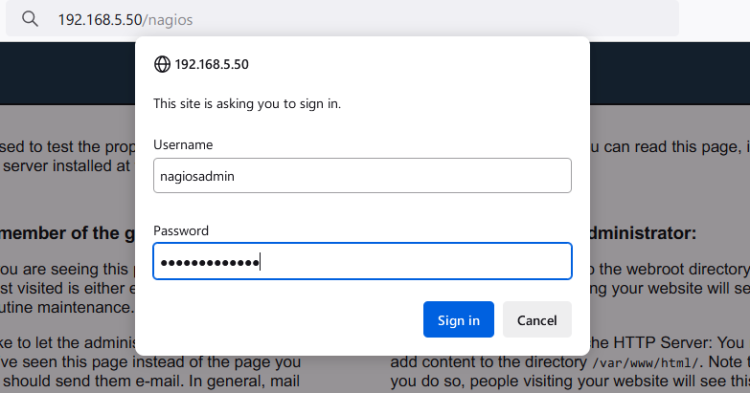
如果您拥有 nagiosadmin 用户的正确密码,您将看到如下所示的 Nagios 管理仪表板:
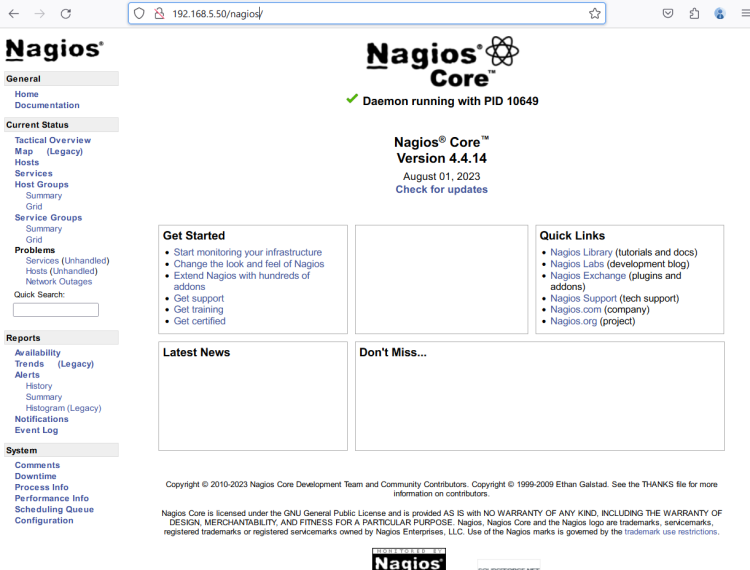
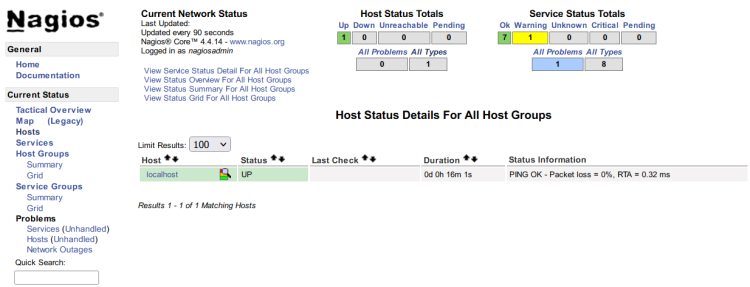
接下来,单击 Hosts 菜单以获取 Nagios 系统中的主机/机器列表。您应该看到您的 AlmaLinux 本地主机正受到 Nagios 监控。
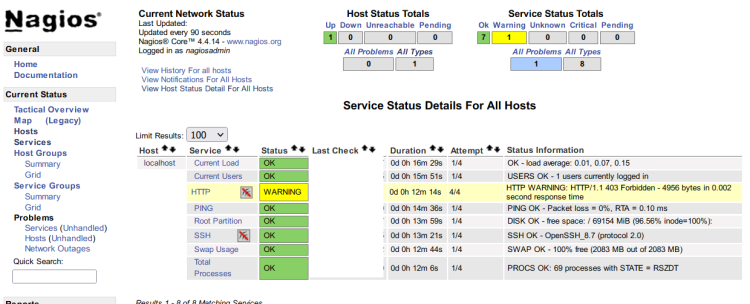
现在单击 Services 菜单以获取监控系统中的服务列表。在本示例中,您应该看到 Nagios 服务器的默认监控,其中包含 HTTP、SSH、进程监控、系统负载、登录用户以及分区详情等一些服务。
现在您已完成 nagios 的安装。
总结
恭喜!您已完成在 AlmaLinux 9 服务器上安装 Nagios 监控工具。您已将 Nagios 与 httpd Web 服务器和 PHP 一起安装,还启用了 Nagios 身份验证并更改了 nagiosadmin 的默认密码。接下来,您现在可以通过 Nagios 插件和 Nagios NRPE 插件添加要监控的主机。