

FastAPI是一个基于Python的Web框架,用于创建API服务。它是一个现代、快速、高性能的框架,支持异步操作。
在本教程中,您将学习如何在Ubuntu 24.04上安装FastAPI与MongoDB。您还将学习如何使用FastAPI和MongoDB数据库创建第一个具有CRUD操作的API。
前提条件
- 一台Ubuntu 24.04系统
- 一个具有管理员权限的非root用户
安装MongoDB
在创建新的FastAPI项目之前,让我们先将MongoDB服务器安装到系统中。
更新软件包索引并安装依赖项:
sudo apt update && sudo apt install gnupg curl -y为MongoDB添加GPG密钥:
curl -fsSL https://www.mongodb.org/static/pgp/server-8.0.asc | \
sudo gpg -o /usr/share/keyrings/mongodb-server-8.0.gpg \
--dearmor
添加MongoDB软件源:
echo "deb [ arch=amd64,arm64 signed-by=/usr/share/keyrings/mongodb-server-8.0.gpg ] https://repo.mongodb.org/apt/ubuntu noble/mongodb-org/8.0 multiverse" | sudo tee /etc/apt/sources.list.d/mongodb-org-8.0.list
刷新软件包索引并安装MongoDB:
sudo apt update && sudo apt install mongodb-org启动、启用并验证MongoDB服务:
sudo systemctl enable --now mongod
sudo systemctl status mongod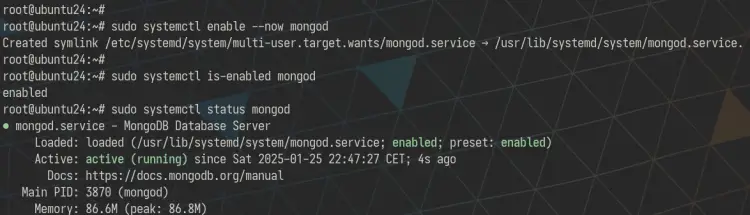
登录MongoDB Shell(按Ctrl+d退出):
mongosh配置Python与虚拟环境
安装Python、Pip和Venv:
sudo apt install python3 python3-pip python3-venv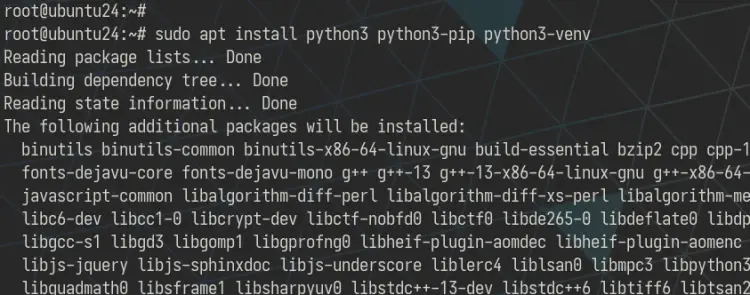
切换到您的用户账户:
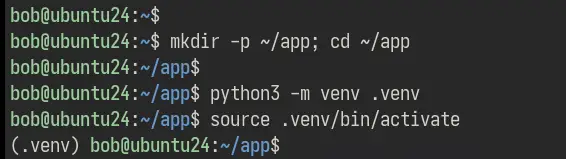
su - username创建并进入项目目录:
mkdir -p ~/app; cd ~/app创建并激活虚拟环境:
python3 -m venv .venv
source .venv/bin/activate激活后Shell提示符将变为:(venv) user@hostname
停用虚拟环境:
deactivate创建FastAPI项目
安装FastAPI和Uvicorn:
pip3 install fastapi uvicornfastapi— 用于在Python中构建API的主要FastAPI Web框架uvicorn— Python中ASGI(异步服务器网关接口)的Web服务器实现
创建项目目录结构:
mkdir -p server/{models,routes}
touch main.py server/{app.py,database.py} server/models/itemModels.py server/routes/item.py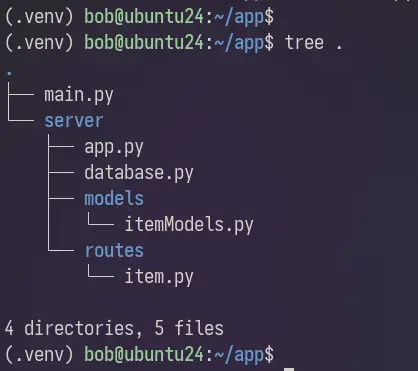
编辑 server/app.py(初始版本):
from fastapi import FastAPI

app = FastAPI()

@app.get("/")
async def root():
    return {"message": "Hello FastAPI!"}
- 导入FastAPI模块并将其绑定到
app变量 - 创建
root函数,返回"Hello FastAPI!" root响应根URL上的GET请求async将函数标记为异步
编辑 main.py:
import uvicorn

if __name__ == "__main__":
    uvicorn.run("server.app:app", host="0.0.0.0", port=8080, reload=True)
- 导入
uvicorn模块 - 执行时,从
server/app.py加载appFastAPI模块 - 在
0.0.0.0的8080端口上运行 reload=True在代码更改时启用自动重载
运行FastAPI项目:
python3 main.py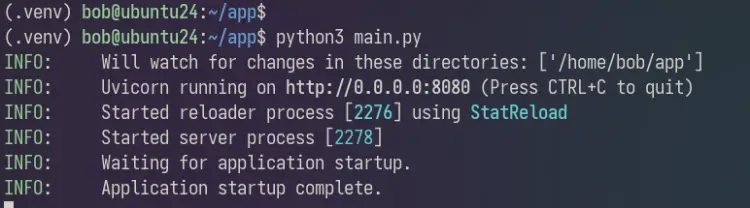
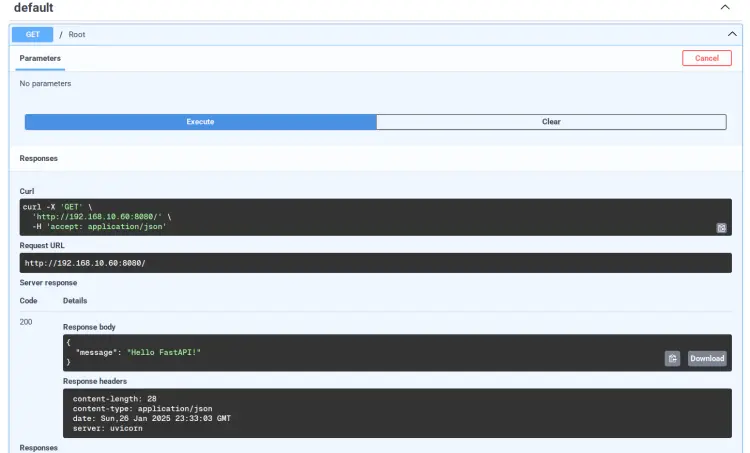
- 访问
http://服务器IP:8080/可以看到Hello FastAPI!消息 - 访问
http://服务器IP:8080/docs查看API文档(Swagger UI)
将FastAPI连接到MongoDB
安装motor MongoDB驱动(非阻塞、基于协程):
pip3 install motor编辑 server/database.py:
from motor.motor_asyncio import AsyncIOMotorClient

MONGODB_HOST = "mongodb://localhost:27017"

connection = AsyncIOMotorClient(MONGODB_HOST)

database = connection.items
item_collection = database.get_collection("item_collection")
- 从
motor.motor_asyncio导入AsyncIOMotorClient MONGODB_HOST指向本地MongoDB服务器connection连接到MongoDB服务器database连接到items数据库item_collection访问item_collection集合
使用pydantic创建数据库模型
安装pydantic(数据验证库):
pip3 install pydantic编辑 server/models/itemModels.py:
from pydantic import BaseModel, Field
from typing import Optional

class Item(BaseModel):
    name: str
    category: str
    stocks: int
    price: int = Field(gt=0)

    class Config:
        json_schema_extra = {
            "example": {
                "name": "Company Smart Watch",
                "category": "smartwatch",
                "stocks": 10,
                "price": 1000,
            }
        }

class ItemUpdate(BaseModel):
    name: Optional[str] = None
    category: Optional[str] = None
    stocks: Optional[int] = None
    price: Optional[int] = None

    class Config:
        json_schema_extra = {
            "example": {
                "name": "New Smart watch",
                "category": "new-smartwatch",
                "stocks": 5,
                "price": 500,
            }
        }
Item模型:name、category(字符串);stocks、price(整数);price必须大于0Config类提供请求示例数据ItemUpdate模型:所有字段均为可选(支持部分更新)
添加CRUD操作
在 server/database.py 中添加以下内容。
导入ObjectId:
from bson.objectid import ObjectId
数据格式化辅助函数:
def item_helper(item) -> dict:
    return {
        "id": str(item["_id"]),
        "name": item["name"],
        "category": item["category"],
        "stocks": item["stocks"],
        "price": item["price"],
    }
创建数据项:
# 添加新数据项
async def add_item(item_details: dict) -> dict:
    item = await item_collection.insert_one(item_details)
    new_item = await item_collection.find_one({"_id": item.inserted_id})
    return item_helper(new_item)
- 接受数据项详情字典
- 使用
insert_one添加数据项 - 返回新插入的数据项
获取所有数据项:
# 获取所有数据项
async def get_items():
    items = []
    async for item in item_collection.find():
        items.append(item_helper(item))
    return items
- 创建空的
items列表 - 使用
find()遍历所有文档 - 将每个数据项追加到列表并返回
按ID获取特定数据项:
# 获取特定数据项
async def get_item(id: str) -> dict:
    item = await item_collection.find_one({"_id": ObjectId(id)})
    if item:
        return item_helper(item)
    return "Item Not Found."
- 以
ObjectId(id)为选择器使用find_one() - 返回数据项详情或
"Item Not Found."
更新数据项:
# 更新数据项
async def change_item(id: str, data: dict):
    if len(data) < 1:
        return "Please input your data"
    find_item = await item_collection.find_one({"_id": ObjectId(id)})
    if find_item:
        item_update = await item_collection.update_one({"_id": ObjectId(id)}, {"$set": data})
        if item_update:
            return True
        return False
- 接受
id(选择器)和data(新值) - 若
data为空则终止 - 使用带
$set操作符的update_one - 成功返回
True,失败返回False
删除数据项:
# 删除数据项
async def delete_item(id: str):
    item = await item_collection.find_one({"_id": ObjectId(id)})
    if item:
        await item_collection.delete_one({"_id": ObjectId(id)})
        return(f'Item {id} deleted.')
    return "Item Not Found."
- 按
id查找数据项,使用delete_one()删除 - 返回
"Item {id} deleted."或"Item Not Found."
为CRUD操作添加路由
编辑 server/routes/item.py,添加导入和路由器:
from fastapi import APIRouter, Body
from fastapi.encoders import jsonable_encoder

from server.database import (
    add_item,
    get_items,
    get_item,
    change_item,
    delete_item,
)

from server.models.itemModels import (
    Item,
    ItemUpdate,
)

router = APIRouter()
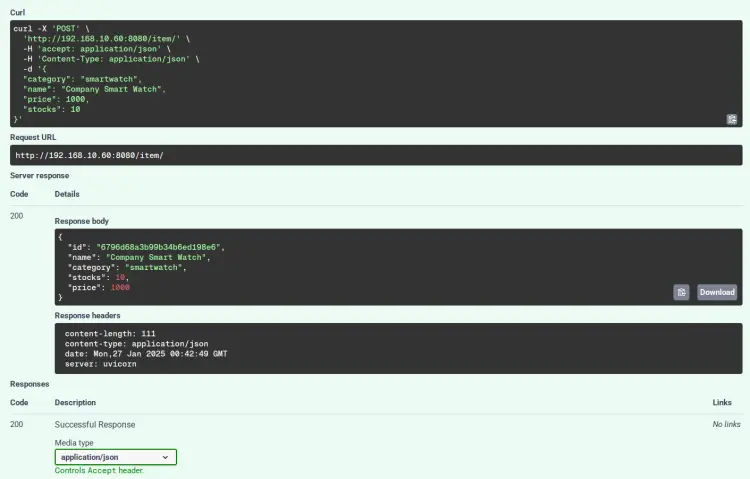
添加新数据项路由 — POST /item:
# 添加新数据项操作
@router.post("/")
async def add_item_data(item: Item = Body(...)):
    item = jsonable_encoder(item)
    new_item = await add_item(item)
    return new_item
- 接受请求体中的
Item模型 - 通过
jsonable_encoder转换为字典 - 调用
add_item()并返回新数据项
获取所有数据项路由 — GET /item:
# 获取所有可用数据项
@router.get("/")
async def get_item_data():
    items = await get_items()
    if items:
        return items
    return "No available item."
- 调用
get_items()并返回所有数据项 - 若为空则返回
"No available item."
获取特定数据项路由 — GET /item/{id}:
# 通过id展示数据项详情
@router.get("/{id}")
async def get_item_details(id):
    item_details = await get_item(id)
    if item_details:
        return item_details
    return "Item not found."
- 将URL中的
id传递给get_item() - 返回数据项详情或
"Item not found."
更新数据项路由 — PUT /item/{id}:
# 更新数据项
@router.put("/{id}")
async def update_item(id: str, data: ItemUpdate = Body(...)):
    data = {k: v for k, v in data.dict().items() if v is not None}
    updated_item = await change_item(id, data)
    if updated_item:
        return{f'Success: item {id} updated.'}
    return "Error"
- 接受
id和ItemUpdate请求体 - 过滤掉
None值(支持部分更新) - 调用
change_item()并返回成功/错误信息
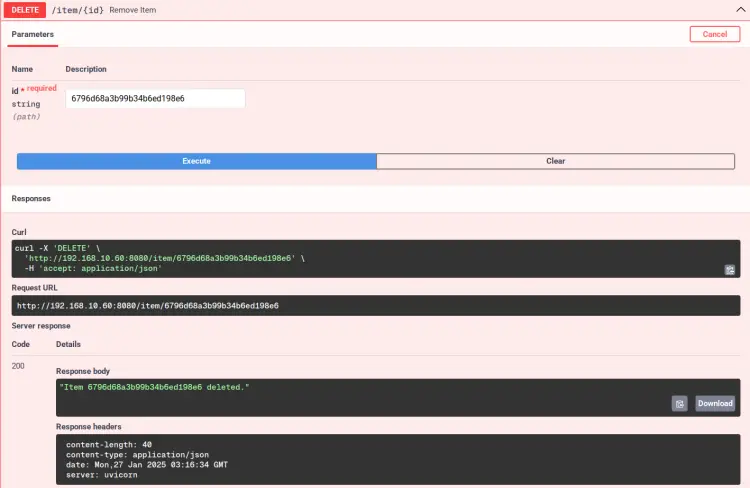
删除数据项路由 — DELETE /item/{id}:
# 通过id删除数据项
@router.delete("/{id}")
async def remove_item(id):
    item_to_delete = await delete_item(id)
    if item_to_delete:
        return item_to_delete
    return{f'Item {id} Not Available.'}
- 以
id调用delete_item() - 返回删除确认或不可用消息
更新 server/app.py(最终版本),注册所有路由:
from fastapi import FastAPI
from server.routes.item import router as ItemRouter

app = FastAPI()

@app.get("/")
async def root():
    return {"message": "Hello FastAPI!"}

app.include_router(ItemRouter, tags=["Item"], prefix="/item")
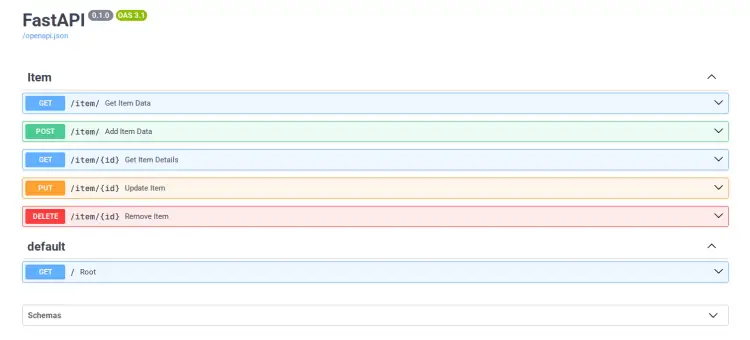
CRUD端点汇总:
| 操作 | 方法 | URL |
|---|---|---|
| 添加新数据项 | POST | /item |
| 获取所有数据项 | GET | /item |
| 获取特定数据项 | GET | /item/{id} |
| 更新数据项 | PUT | /item/{id} |
| 删除数据项 | DELETE | /item/{id} |
测试CRUD操作
运行项目:
python3 main.py访问 http://服务器IP:8080/docs 进入包含所有路由的Swagger UI。
添加新数据项:
获取所有数据项:
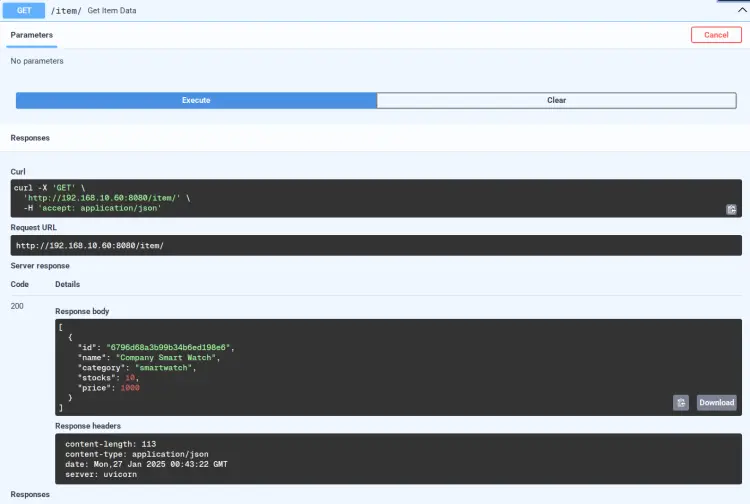
获取特定数据项:
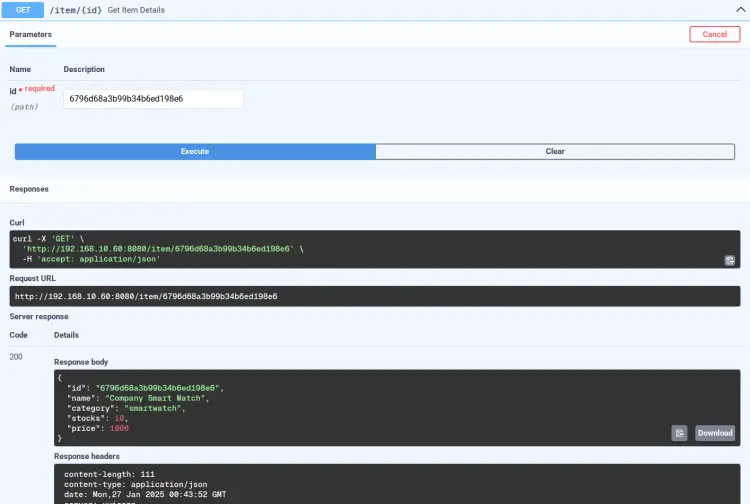
更新数据项:
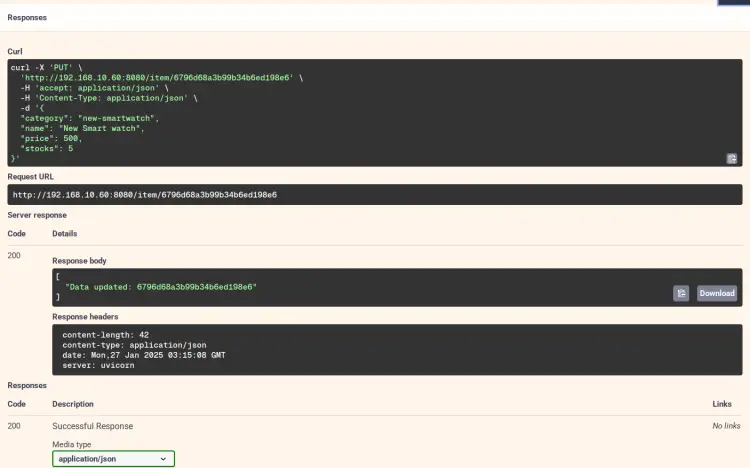
更新后的数据:
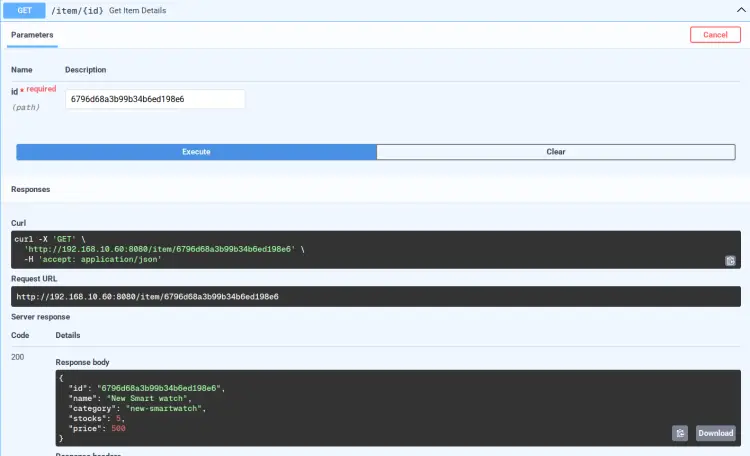
删除数据项:
总结
您已完成在Ubuntu 24.04上安装FastAPI与MongoDB。主要成果包括:
- 安装并配置了MongoDB服务器
- 配置了Python虚拟环境
- 使用
motor模块将FastAPI连接到MongoDB - 通过
pydantic创建了数据模型 - 实现了完整的CRUD操作
- 创建了API端点并通过Swagger UI进行了测试