
本页内容
- 前置条件
- 安装 LEMP 服务器
- 安装 PHP Composer
- 在 Ubuntu 22.04 上安装 Laravel
- 为 Laravel 配置 Nginx
- 访问 Laravel Web 界面
- 使用 Let's Encrypt 保护 Laravel
- 结语
Laravel 是由 Taylor Otwell 创建的一个免费的、开源的 PHP Web 框架。它基于 Symfony 构建,并遵循模型-视图-控制器(MVC)架构模式。其设计目的是通过优雅而强大的语法来构建高端 Web 应用程序。它内置了许多功能,使 Web 应用的开发变得更加轻松、快捷。Laravel 在发布第 3 版后获得了更高的关注度,该版本包含了诸多实用功能,如 Artisan 命令行、支持的数据库,并引入了名为 bundles 的包管理系统。
本教程将向你展示如何在 Ubuntu 22.04 上使用 Nginx Web 服务器安装 Laravel PHP 框架。
前置条件
- 一台运行 Ubuntu 22.04 的服务器。
- 一个已解析到你服务器 IP 的有效域名。
- 服务器上已配置了 root 密码。
安装 LEMP 服务器
在开始之前,你需要在服务器上安装 Nginx Web 服务器、MariaDB 数据库系统、PHP 以及其他所需的依赖项。你可以运行以下命令来安装所有这些组件:
apt install -y nginx mariadb-server php php-fpm php-common php-cli php-gd php-mysqlnd php-curl php-intl php-mbstring php-bcmath php-xml php-zip wget git所有软件包安装完成后,使用以下命令验证 PHP 版本:
php -v你应该会看到类似以下的输出:
PHP 8.1.2 (cli) (built: Apr  7 2022 17:46:26) (NTS)
Copyright (c) The PHP Group
Zend Engine v4.1.2, Copyright (c) Zend Technologies
    with Zend OPcache v8.1.2, Copyright (c), by Zend Technologies
安装 PHP Composer
Composer 是用于管理 PHP 依赖的 PHP 依赖管理器。要安装 Composer,你需要先在服务器上安装 curl 软件包。
apt install -y curl接下来,使用以下命令安装 PHP Composer:
curl -sS https://getcomposer.org/installer | php -- --install-dir=/usr/bin --filename=composerComposer 安装完成后,你将看到以下输出:
All settings correct for using Composer
Downloading...

Composer (version 2.3.5) successfully installed to: /usr/bin/composer
Use it: php /usr/bin/composer
接下来,使用以下命令验证 Composer 版本:
composer --version你应该会看到以下输出:
Composer version 2.3.5 2022-04-13 16:43:00
在 Ubuntu 22.04 上安装 Laravel
首先,进入 Nginx 的 Web 根目录,并使用 Composer 命令下载最新版本的 Laravel:
cd /var/www/html
composer create-project laravel/laravel laravel
你将看到以下输出:
55 package suggestions were added by new dependencies, use `composer suggest` to see details.
Generating optimized autoload files
> Illuminate\Foundation\ComposerScripts::postAutoloadDump
> @php artisan package:discover --ansi
Discovered Package: laravel/sail
Discovered Package: laravel/sanctum
Discovered Package: laravel/tinker
Discovered Package: nesbot/carbon
Discovered Package: nunomaduro/collision
Discovered Package: spatie/laravel-ignition
Package manifest generated successfully.
78 packages you are using are looking for funding.
Use the `composer fund` command to find out more!
> @php artisan vendor:publish --tag=laravel-assets --ansi --force
No publishable resources for tag [laravel-assets].
Publishing complete.
> @php artisan key:generate --ansi
Application key set successfully.
接下来,切换到 Laravel 目录,并使用以下命令启动 Laravel:
cd laravel
php artisan serve --host 0.0.0.0 --port 8000
如果一切正常,你应该会看到以下输出:
Starting Laravel development server: http://0.0.0.0:8000
[Sun May 22 08:17:45 2022] PHP 8.1.2 Development Server (http://0.0.0.0:8000) started
按 CTRL+C 停止 Laravel。接下来,更改 Laravel 的所有者和权限:
chown -R www-data:www-data /var/www/html/laravel
chmod -R 0777 /var/www/html/laravel
为 Laravel 配置 Nginx
接下来,使用以下命令为 Laravel 创建一个 Nginx 虚拟主机配置文件:
nano /etc/nginx/conf.d/laravel.conf添加以下行:
server {
    listen 80;
    server_name laravel.example.com;
    root /var/www/html/laravel/public;

    add_header X-Frame-Options "SAMEORIGIN";
    add_header X-XSS-Protection "1; mode=block";
    add_header X-Content-Type-Options "nosniff";

    index index.html index.htm index.php;

    charset utf-8;

    location / {
        try_files $uri $uri/ /index.php?$query_string;
    }

    location = /favicon.ico { access_log off; log_not_found off; }
    location = /robots.txt  { access_log off; log_not_found off; }

    error_page 404 /index.php;

    location ~ \.php$ {
        fastcgi_pass unix:/var/run/php/php8.1-fpm.sock;
        fastcgi_index index.php;
        fastcgi_param SCRIPT_FILENAME $realpath_root$fastcgi_script_name;
        include fastcgi_params;
    }

    location ~ /\.(?!well-known).* {
        deny all;
    }
}
完成后保存并关闭文件,然后使用以下命令检查 Nginx 是否存在语法错误:
nginx -t你将看到以下输出:
nginx: the configuration file /etc/nginx/nginx.conf syntax is ok
nginx: configuration file /etc/nginx/nginx.conf test is successful
接下来,重启 Nginx 和 PHP-FPM 服务以使更改生效:
systemctl restart php8.1-fpm nginx你也可以使用以下命令检查 Nginx 的状态:
systemctl status nginx你应该会看到以下输出:
? nginx.service - A high performance web server and a reverse proxy server
     Loaded: loaded (/lib/systemd/system/nginx.service; enabled; vendor preset: enabled)
     Active: active (running) since Sun 2022-05-22 08:19:20 UTC; 17s ago
       Docs: man:nginx(8)
    Process: 16865 ExecStartPre=/usr/sbin/nginx -t -q -g daemon on; master_process on; (code=exited, status=0/SUCCESS)
    Process: 16866 ExecStart=/usr/sbin/nginx -g daemon on; master_process on; (code=exited, status=0/SUCCESS)
   Main PID: 16867 (nginx)
      Tasks: 2 (limit: 2292)
     Memory: 2.6M
        CPU: 33ms
     CGroup: /system.slice/nginx.service
             ??16867 "nginx: master process /usr/sbin/nginx -g daemon on; master_process on;"
             ??16868 "nginx: worker process" "" "" "" "" "" "" "" "" "" "" "" "" "" "" "" "" "" "" "" "" "" "" "" "" "" "" ""

May 22 08:19:20 ubuntu2204 systemd[1]: Starting A high performance web server and a reverse proxy server...
May 22 08:19:20 ubuntu2204 systemd[1]: Started A high performance web server and a reverse proxy server.
访问 Laravel Web 界面
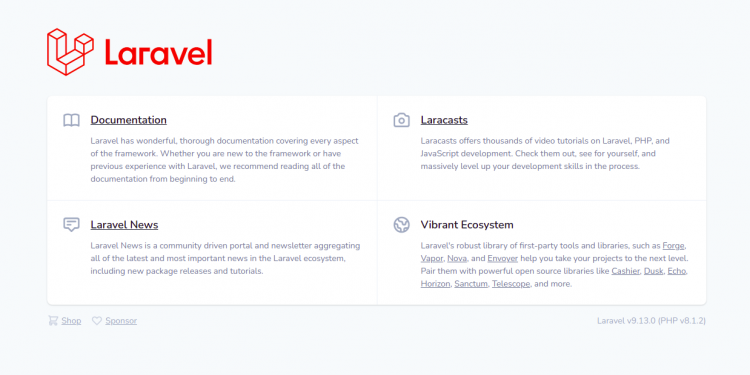
至此,Laravel 已安装并与 Nginx 完成配置。你现在可以通过 URL http://laravel.example.com 访问 Laravel Web 界面。你应该在以下页面上看到 Laravel 仪表盘:
使用 Let's Encrypt 保护 Laravel
接下来,你需要安装 Certbot 客户端软件包,以便安装和管理 Let's Encrypt SSL 证书。
首先,使用以下命令安装 Certbot:
apt-get install certbot python3-certbot-nginx -y安装完成后,运行以下命令为你的网站安装 Let's Encrypt SSL 证书:
certbot --nginx -d laravel.example.com系统会要求你提供一个有效的电子邮件地址并接受服务条款,如下所示:
Saving debug log to /var/log/letsencrypt/letsencrypt.log
Plugins selected: Authenticator nginx, Installer nginx
Enter email address (used for urgent renewal and security notices) (Enter 'c' to
cancel):
[email protected]


- - - - - - - - - - - - - - - - - - - - - - - - - - - - - - - - - - - - - - - -
Please read the Terms of Service at
https://letsencrypt.org/documents/LE-SA-v1.2-November-15-2017.pdf. You must
agree in order to register with the ACME server at
https://acme-v02.api.letsencrypt.org/directory
- - - - - - - - - - - - - - - - - - - - - - - - - - - - - - - - - - - - - - - -
(A)gree/(C)ancel: A

- - - - - - - - - - - - - - - - - - - - - - - - - - - - - - - - - - - - - - - -
Would you be willing to share your email address with the Electronic Frontier
Foundation, a founding partner of the Let's Encrypt project and the non-profit
organization that develops Certbot? We'd like to send you email about our work
encrypting the web, EFF news, campaigns, and ways to support digital freedom.
- - - - - - - - - - - - - - - - - - - - - - - - - - - - - - - - - - - - - - - -
(Y)es/(N)o: Y
Obtaining a new certificate
Performing the following challenges:
http-01 challenge for laravel.example.com
Waiting for verification...
Cleaning up challenges
Deploying Certificate to VirtualHost /etc/nginx/conf.d/laravel.conf
接下来,选择是否将 HTTP 流量重定向到 HTTPS,如下所示:
- - - - - - - - - - - - - - - - - - - - - - - - - - - - - - - - - - - - - - - -
1: No redirect - Make no further changes to the webserver configuration.
2: Redirect - Make all requests redirect to secure HTTPS access. Choose this for
new sites, or if you're confident your site works on HTTPS. You can undo this
change by editing your web server's configuration.
- - - - - - - - - - - - - - - - - - - - - - - - - - - - - - - - - - - - - - - -
Select the appropriate number [1-2] then [enter] (press 'c' to cancel): 2
输入 2 并按 Enter 完成安装。你应该会看到以下输出:
Redirecting all traffic on port 80 to ssl in /etc/nginx/conf.d/laravel.conf

- - - - - - - - - - - - - - - - - - - - - - - - - - - - - - - - - - - - - - - -
Congratulations! You have successfully enabled https://laravel.example.com

You should test your configuration at:
https://www.ssllabs.com/ssltest/analyze.html?d=laravel.example.com
- - - - - - - - - - - - - - - - - - - - - - - - - - - - - - - - - - - - - - - -

IMPORTANT NOTES:
 - Congratulations! Your certificate and chain have been saved at:
   /etc/letsencrypt/live/laravel.example.com/fullchain.pem
   Your key file has been saved at:
   /etc/letsencrypt/live/laravel.example.com/privkey.pem
   Your cert will expire on 2022-08-22. To obtain a new or tweaked
   version of this certificate in the future, simply run certbot again
   with the "certonly" option. To non-interactively renew *all* of
   your certificates, run "certbot renew"
 - Your account credentials have been saved in your Certbot
   configuration directory at /etc/letsencrypt. You should make a
   secure backup of this folder now. This configuration directory will
   also contain certificates and private keys obtained by Certbot so
   making regular backups of this folder is ideal.
 - If you like Certbot, please consider supporting our work by:

   Donating to ISRG / Let's Encrypt:   https://letsencrypt.org/donate
   Donating to EFF:                    https://eff.org/donate-le

 - We were unable to subscribe you the EFF mailing list because your
   e-mail address appears to be invalid. You can try again later by
   visiting https://act.eff.org.
结语
恭喜!你已成功在 Ubuntu 22.04 上使用 Nginx 安装了 Laravel。你现在可以开始使用 Laravel 框架开发高性能的 PHP 应用程序了。如果你有任何疑问,欢迎随时向我提问。