
Pydio Cells 是一个开源的文档共享与协作平台,适用于组织内部文件管理。它允许你在组织内跨部门共享文档和文件,并提供对文档共享环境的完全控制。
Pydio Cells 在性能方面表现优异,能够处理大文件传输,并提供高级工作流自动化功能。
本教程将指导你在 AlmaLinux 9 服务器上安装 Pydio Cells。你将使用 MariaDB 数据库服务器和 Httpd Web 服务器来部署 Pydio Cells。
前提条件
在开始本教程之前,请确保满足以下条件:
• 一台 AlmaLinux 9 服务器
• 一个具有管理员权限的非 root 用户
• 一个已解析到服务器 IP 地址的域名
• SELinux 状态为启用且处于 permissive 模式
安装依赖
在安装 Pydio Cells 之前,你需要在 AlmaLinux 服务器上安装相关依赖。这包括 EPEL 仓库、MariaDB 数据库服务器、Httpd Web 服务器,以及 wget 和 nano 等系统工具。
首先运行以下 dnf 命令来添加 EPEL 仓库,并安装 MariaDB 服务器和 Httpd Web 服务器。输入 Y 确认安装。
sudo dnf install epel-release mariadb-server httpd wget nano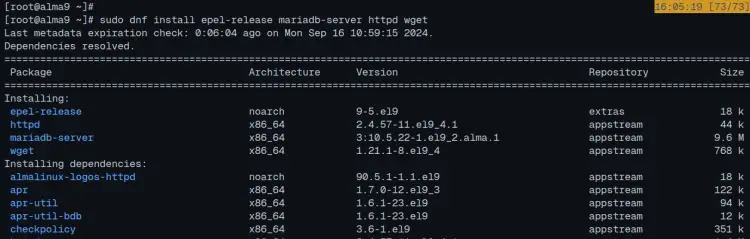
安装完成后,运行以下 systemctl 命令来启动、启用并验证 httpd 服务。你将看到 httpd 服务正在运行且已启用。
sudo systemctl enable --now httpd \nsudo systemctl status httpd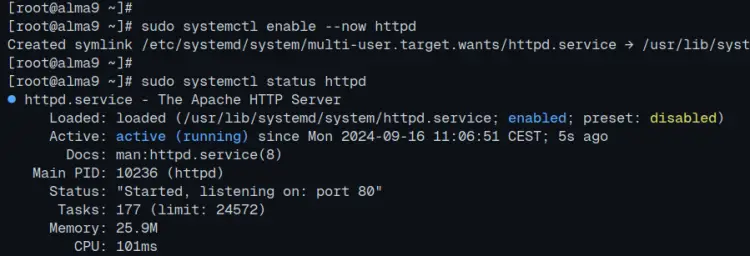
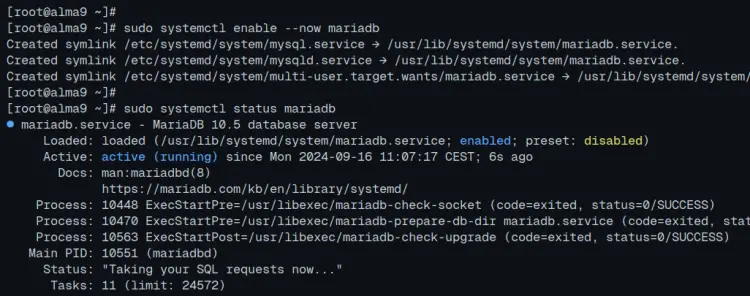
现在运行以下命令来启动并启用 mariadb 服务,然后验证服务是否正在运行。
sudo systemctl enable --now mariadb \nsudo systemctl status mariadb从以下输出中,你可以看到 MariaDB 服务器正在运行且已启用。
最后运行以下 firewall-cmd 命令来开放 http 和 https 端口,然后重新加载 firewalld 规则以应用更改。
sudo firewall-cmd --add-service={http,https} --permanent \nsudo firewall-cmd --reload配置 MariaDB 服务器
安装完依赖后,你需要加固 MariaDB 服务器安装,并为 Pydio Cells 服务器安装创建新的数据库和用户。你将使用 mariadb-secure-installation 命令加固 MariaDB,然后通过 mariadb 客户端创建新的数据库和用户。
要加固 MariaDB 服务器安装,请执行以下命令。
sudo mariadb-secure-installation在此过程中,系统会询问你以下配置:
• 是否将本地认证切换为 unix_socket?输入 n。
• 是否设置新的 MariaDB root 密码?输入 y 确认,然后输入新密码。
• 是否移除匿名用户?输入 y 确认。
• 是否删除默认的 test 数据库?输入 y 确认。
• 是否禁止 MariaDB root 远程登录?输入 y 确认。
• 是否重新加载表权限并应用更改?输入 y 并按 ENTER。
现在 MariaDB 服务器已加固,你将为 Pydio Cells 安装创建新的数据库和用户。
使用以下命令登录 MariaDB 服务器,在提示时输入 MariaDB root 密码。
sudo mariadb -u root -p运行以下查询来创建新数据库 cells 和新用户 pydio,密码为 p4ssw0rd。你可以根据需要调整数据库信息。
CREATE DATABASE cells; \nCREATE USER 'pydio'@'localhost' IDENTIFIED BY 'p4ssw0rd'; \nGRANT ALL PRIVILEGES ON cells.* to 'pydio'@'localhost'; \nFLUSH PRIVILEGES;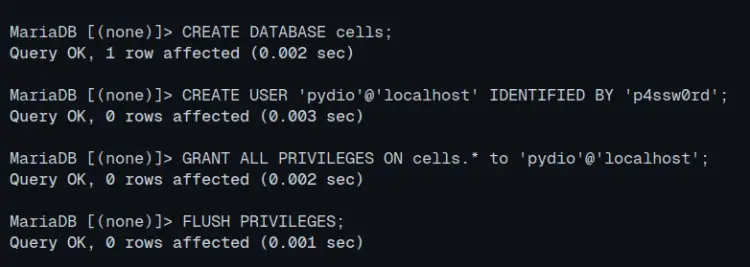
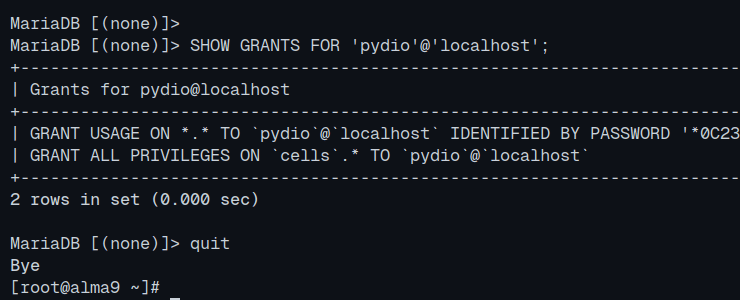
现在检查用户 pydio 的权限,以确保其拥有对数据库 cells 的访问权限。
SHOW GRANTS FOR 'pydio'@'localhost';从以下输出中可以看到,数据库 cells 可以通过用户 pydio 访问。
输入 quit 退出 MariaDB 服务器。
下载 Pydio Cells
配置好 MariaDB 数据库后,你就可以下载 Pydio Cells 了。在本节中,你将创建 pydio 用户、下载 Pydio Cells、设置安装目录和环境变量,并允许 Pydio Cells 在特权端口上运行。
使用以下命令创建新用户和组 pydio。
sudo useradd -m -s /bin/bash pydio使用以下命令创建新目录 /opt/pydio/bin 和 /var/cells,然后将这两个目录的所有权更改为用户 pydio。
sudo mkdir -p /opt/pydio/bin /var/cells \nsudo chown -R pydio:pydio /opt/pydio/bin /var/cells使用 nano 编辑器创建新的环境变量文件 /etc/profile.d/cells-env.sh。
sudo nano /etc/profile.d/cells-env.sh输入以下脚本来设置 Pydio Cells 的环境变量。确保将 CELLS_EXTERNAL 地址更改为你的 Pydio 安装的域名。
export CELLS_WORKING_DIR=/var/cells \nexport CELLS_BIND=127.0.0.1:8080 \nexport CELLS_EXTERNAL=https://cells.howtoforge.local
完成后保存并退出文件。
现在运行以下命令使环境变量文件 /etc/profile.d/cells-env.sh 可执行。
sudo chmod +x /etc/profile.d/cells-env.sh接下来运行以下命令下载 Pydio Cells Linux 版二进制文件到 /opt/pydio/bin/cells。
export distribId=cells \nwget -O /opt/pydio/bin/cells https://download.pydio.com/latest/${distribId}/release/{latest}/linux-amd64/${distribId}下载完成后,运行以下命令使 cells 二进制文件可执行,并允许其绑定特权端口。
sudo chmod a+x /opt/pydio/bin/cells \nsudo setcap 'cap_net_bind_service=+ep' /opt/pydio/bin/cells \nsudo ln -s /opt/pydio/bin/cells /usr/local/bin/cells现在使用以下命令切换到用户 pydio。
su - pydio使用以下命令检查 Pydio Cells 的环境变量,确保输出与环境变量文件 /etc/profile.d/cells-env.sh 中的内容一致。
echo $CELLS_WORKING_DIR \necho $CELLS_BIND \necho $CELLS_EXTERNAL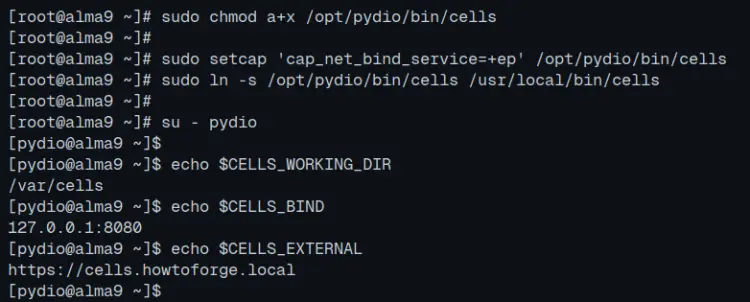
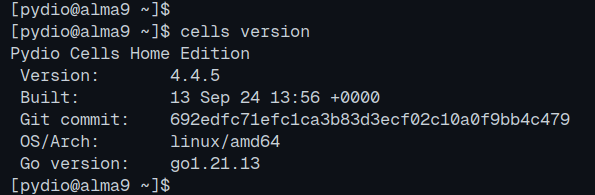
最后使用以下命令检查 cells 版本。
cells version从以下输出中可以看到 Pydio Cells 的版本信息。
通过命令行安装 Pydio Cells
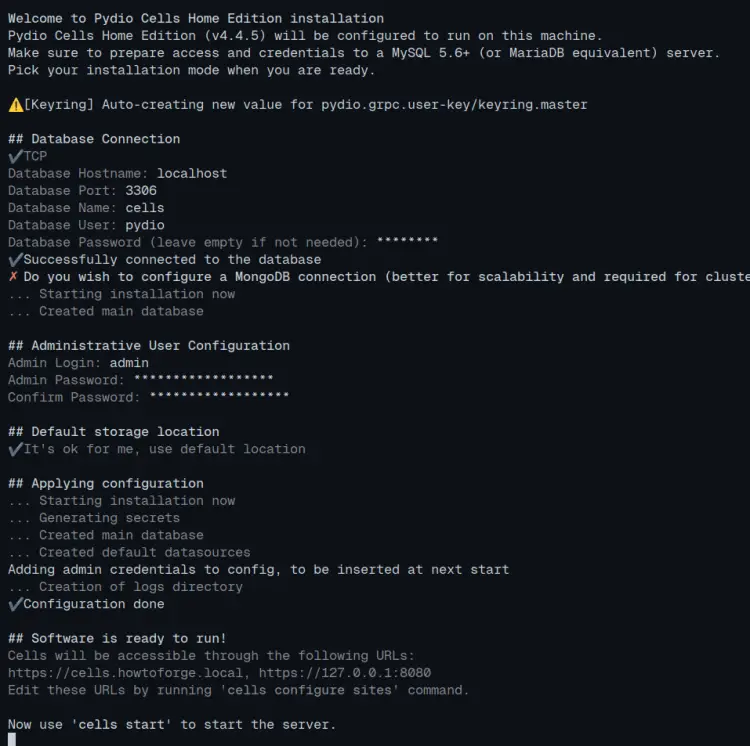
现在你将从命令行开始安装 Pydio Cells。使用 cells 命令,你将配置 Pydio Cells 使用 MariaDB 数据库、设置管理员用户名和密码,以及设置用户数据的存储位置。
首先运行以下命令从终端配置 Pydio Cells 安装。
cells configure --cli系统将提示你进行以下配置:
• 数据库连接:选择通过 TCP,然后输入 MariaDB 数据库的主机、端口、用户名和密码。
• MongoDB 配置:输入 n 选择不使用。
• 管理员用户配置:输入 Pydio Cells 的管理员用户名和密码。
• 默认存储位置:按 ENTER 使用默认值继续。
过程完成后,你将看到以下输出。
设置 Pydio Cells 的 systemd 服务文件
从上一步开始,你可以使用 cells start 命令启动 Pydio Cells。为了更方便管理,你将使用 systemd 的 systemctl 来管理 Pydio Cells 服务。现在你将创建一个新的 systemd 服务文件。
使用 nano 编辑器创建新的服务文件 /etc/systemd/system/cells.service。
sudo nano /etc/systemd/system/cells.service插入以下配置来将 Pydio Cells 作为 systemd 服务运行。确保将 CELLS_EXTERNAL 更改为你的域名。
[Unit] \nDescription=Pydio Cells \nDocumentation=https://pydio.com \nWants=network-online.target \nAfter=network-online.target \nAssertFileIsExecutable=/opt/pydio/bin/cells \n \n[Service] \nUser=pydio \nGroup=pydio \nPermissionsStartOnly=true \nAmbientCapabilities=CAP_NET_BIND_SERVICE \nExecStart=/opt/pydio/bin/cells start \nRestart=on-failure \nStandardOutput=journal \nStandardError=inherit \nLimitNOFILE=65536 \nTimeoutStopSec=5 \nKillSignal=INT \nSendSIGKILL=yes \nSuccessExitStatus=0 \nWorkingDirectory=/home/pydio \n \n# Add environment variables \nEnvironment=CELLS_WORKING_DIR=/var/cells \nEnvironment=CELLS_BIND=127.0.0.1:8080 \nEnvironment=CELLS_EXTERNAL=https://cells.howtoforge.local \n \n[Install] \nWantedBy=multi-user.target
保存文件并退出编辑器。
现在运行以下命令重新加载 systemd 管理器。
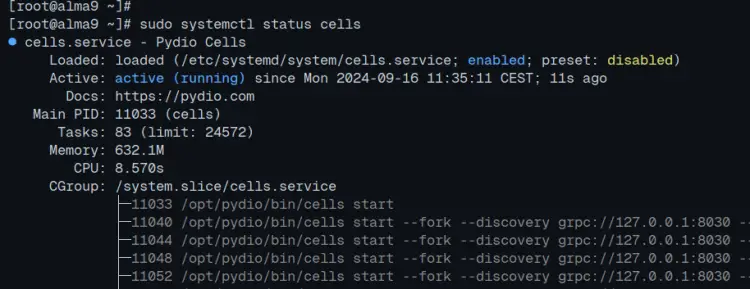
sudo systemctl daemon-reload最后执行以下 systemctl 命令来启动、启用并验证 cells 服务。
sudo systemctl enable --now cells \nsudo systemctl status cells从输出中可以看到 cells 服务正在后台作为 systemd 服务运行。
配置 Httpd 作为反向代理
此时,Pydio Cells 正在你的 AlmaLinux 服务器上的 8080 端口运行。要使其可以从客户端访问,你需要创建 Httpd 虚拟主机文件作为 Pydio Cells 服务器的反向代理。你还将使用 Let's Encrypt 生成 SSL/TLS 证书来保护客户端与 Pydio Cells 服务器之间的数据传输。
首先运行以下 dnf 命令在你的系统上安装 certbot。
sudo dnf install certbot -y现在创建一个新的临时 Web 根目录并将所有权更改为 apache 用户。
sudo mkdir -p /var/www/html/cells/public_html \nsudo chown -R apache:apache /var/www/html/cells/public_html运行以下 certbot 命令为 Pydio Cells 生成 SSL/TLS 证书。确保将电子邮件地址和域名更改为你自己的信息。
sudo certbot certonly --agree-tos --email [email protected] --no-eff-email --webroot -w /var/www/html/cells/public_html -d cells.howtoforge.local接下来使用 nano 编辑器创建新的 Httpd 虚拟主机配置 /etc/httpd/conf.d/pydio.conf。
sudo nano /etc/httpd/conf.d/pydio.conf插入以下配置并确保将 ServerName 更改为你的域名。
\nServerName cells.howtoforge.local \n \nRewriteEngine On \nRewriteCond %{HTTPS} off \nRewriteRule (.*) https://%{HTTP_HOST}%{REQUEST_URI} \n \nRewriteCond %{SERVER_NAME} =cells.howtoforge.local \nRewriteRule ^ https://%{SERVER_NAME}%{REQUEST_URI} [END,NE,R=permanent] \n \n \n\nServerName cells.howtoforge.local \nAllowEncodedSlashes On \nRewriteEngine On \n \n# be aware of this \n# Allow reverse proxy via self-signed certificates \nSSLProxyEngine On \nSSLProxyVerify none \nSSLProxyCheckPeerCN off \nSSLProxyCheckPeerName off \nSSLProxyCheckPeerExpire off \n \n## The order of the directives matters. \n# If Cells is not running with https, consider using ws instead of wss \nProxyPassMatch \"/ws/(.*)\" wss://localhost:8080/ws/$1 nocanon \n \n## This rewrite condition is required if using Cells-Sync \n# RewriteCond %{HTTP:Content-Type} =application/grpc [NC] \n# RewriteRule /(.*) h2://localhost:8080/$1 [P,L] \n \nProxyPass \"/\" \"https://127.0.0.1:8080/\" \nProxyPassReverse \"/\" \"https://127.0.0.1:8080/\" \n \nErrorLog /var/log/httpd/error.log \nCustomLog /var/log/httpd/access.log combined \n \nSSLCertificateFile /etc/letsencrypt/live/cells.howtoforge.local/fullchain.pem \nSSLCertificateKeyFile /etc/letsencrypt/live/cells.howtoforge.local/privkey.pem \n#Include /etc/letsencrypt/options-ssl-apache.conf \n
完成后保存文件并退出编辑器。
现在运行以下 apachectl 命令来验证 Apache 配置语法。如果配置正确,你将看到输出 Syntax is OK。
sudo apachectl configtest最后运行以下 systemctl 命令重新启动 httpd Web 服务器以应用更改。至此,你的 Pydio Cells 安装应该已经完成并可以访问了。
sudo systemctl restart httpd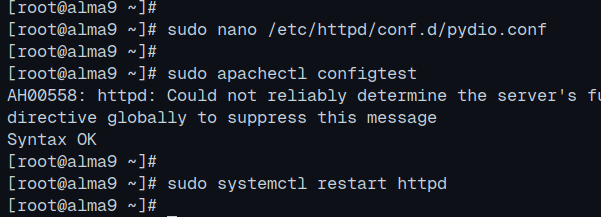
访问 Pydio Cells
打开你的 Web 浏览器,访问 Pydio Cells 安装的域名(例如 https://cells.howtoforge.local)。如果安装成功,你将看到 Pydio Cells 登录页面。
输入你的管理员用户名和密码进行登录。
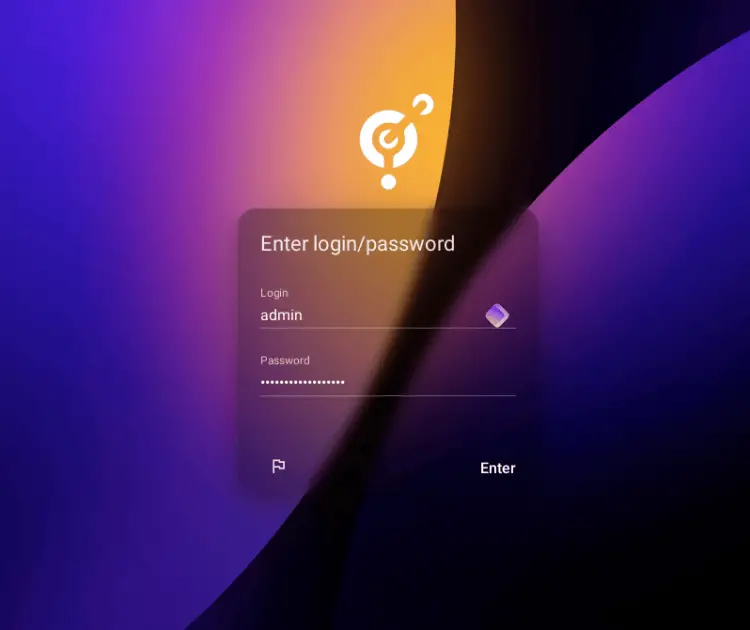
如果你输入了正确的凭据,你将看到 Pydio Cells 用户仪表板,如下所示。
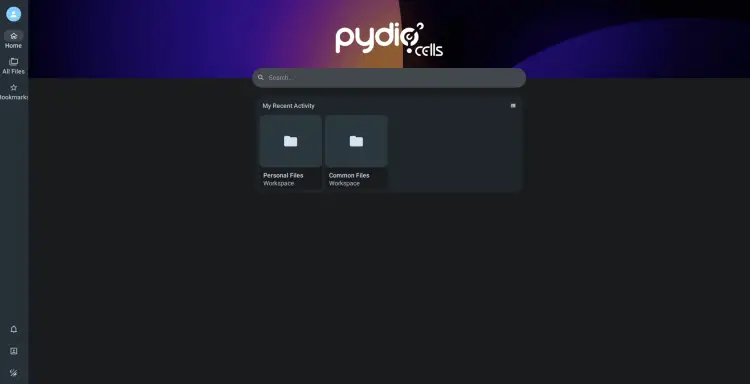
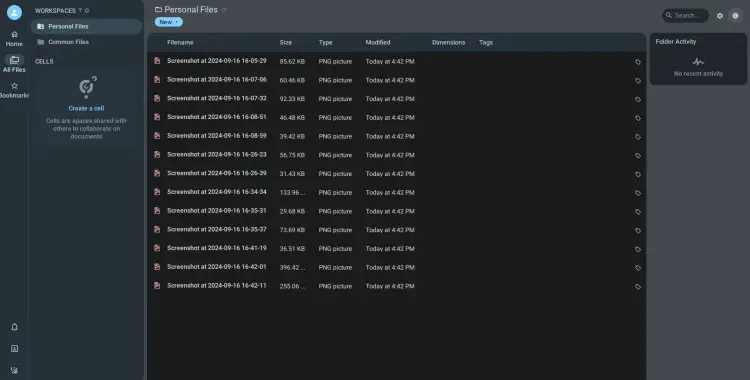
从这里,你可以尝试将文件从本地计算机上传到 Pydio Cells 服务器。在以下截图中,我已成功将文件上传到 Pydio Cells。
总结
恭喜!你已完成在 AlmaLinux 9 服务器上安装 Pydio Cells。你已将 Pydio Cells 与 MariaDB 数据库服务器和 Httpd Web 服务器一起运行。此外,你还通过 Certbot 和 Let's Encrypt 使用 HTTPS 保护了 Pydio Cells 安装。