
本教程适用于以下操作系统版本
- Ubuntu 24.04(Noble Numbat)
- Ubuntu 22.04(Jammy Jellyfish)
- Ubuntu 20.04(Focal Fossa)
- Ubuntu 18.04(Bionic Beaver)
本页内容
- 前提条件
- 第 1 步 - 配置防火墙
- 第 2 步 - 安装 PostgreSQL
- 第 3 步 - 配置 PostgreSQL
- 第 4 步 - 安装 Node.js
- 第 5 步 - 安装 Git
- 第 6 步 - 安装 NodeBB
- 第 7 步 - 将 NodeBB 作为系统服务运行
- 第 8 步 - 安装 Nginx
- 第 9 步 - 安装 SSL
- 第 10 步 - 配置 Nginx
- 第 11 步 - 访问并配置论坛
- 总结
NodeBB 是一款基于 Node.js 框架构建的现代论坛软件。它使用 MongoDB、PostgreSQL 或 Redis 数据库来存储数据,利用 WebSocket 实现实时通知和即时交互。它具备社交网络集成、插件支持、移动端自适应以及完整的 REST 读写 API 等现代化特性。
NodeBB 既提供了开源的自托管项目,也提供了云服务。在本教程中,你将学习如何在 Ubuntu 22.04 服务器上通过 Nginx 安装 NodeBB 论坛。由于 Ubuntu 22.04 官方不再支持 MongoDB,因此我们将使用 PostgreSQL 来存储数据。
前提条件
- 一台运行 Ubuntu 22.04 的服务器,内存至少为 1GB。
- 一个具有 sudo 权限的非 root 用户。
- 已启用并正在运行 uncomplicated Firewall(UFW)防火墙。
- 一个指向该服务器的完整域名(FQDN),例如 forum.example.com。
- 所有软件包均已更新。$ sudo apt update && sudo apt upgrade
一台运行 Ubuntu 22.04 的服务器,内存至少为 1GB。
一个具有 sudo 权限的非 root 用户。
已启用并正在运行 uncomplicated Firewall(UFW)防火墙。
一个指向该服务器的完整域名(FQDN),例如 forum.example.com。
所有软件包均已更新。
$ sudo apt update && sudo apt upgrade
第 1 步 - 配置防火墙
在安装任何软件包之前,第一步是配置防火墙以允许 HTTP 和 HTTPS 连接。
检查防火墙的状态。
$ sudo ufw status
你应该会看到类似下面的输出。
Status: active

To                         Action      From
--                         ------      ----
OpenSSH                    ALLOW       Anywhere
OpenSSH (v6)               ALLOW       Anywhere (v6)
允许 HTTP 和 HTTPS 端口。
$ sudo ufw allow http
$ sudo ufw allow https
再次检查状态以确认。
$ sudo ufw status
Status: active

To                         Action      From
--                         ------      ----
OpenSSH                    ALLOW       Anywhere
80/tcp                     ALLOW       Anywhere
443                        ALLOW       Anywhere
OpenSSH (v6)               ALLOW       Anywhere (v6)
80/tcp (v6)                ALLOW       Anywhere (v6)
443 (v6)                   ALLOW       Anywhere (v6)
第 2 步 - 安装 PostgreSQL
安装 PostgreSQL 的第一步是添加其 GPG 密钥。
$ curl https://www.postgresql.org/media/keys/ACCC4CF8.asc | gpg --dearmor | sudo tee /usr/share/keyrings/postgresql-key.gpg >/dev/null
将 APT 仓库添加到你的软件源列表中。
$ sudo sh -c 'echo "deb [signed-by=/usr/share/keyrings/postgresql-key.gpg arch=amd64] http://apt.postgresql.org/pub/repos/apt $(lsb_release -cs)-pgdg main" > /etc/apt/sources.list.d/pgdg.list'
更新系统软件源。
$ sudo apt update
现在,你可以安装 PostgreSQL 了。
$ sudo apt install postgresql postgresql-contrib
检查 PostgreSQL 服务的状态。
$ sudo systemctl status postgresql
? postgresql.service - PostgreSQL RDBMS
     Loaded: loaded (/lib/systemd/system/postgresql.service; enabled; vendor preset: enabled)
     Active: active (exited) since Sat 2022-09-10 06:25:11 UTC; 13s ago
    Process: 12083 ExecStart=/bin/true (code=exited, status=0/SUCCESS)
   Main PID: 12083 (code=exited, status=0/SUCCESS)
        CPU: 1ms

Sep 10 06:25:11 nodebb systemd[1]: Starting PostgreSQL RDBMS...
Sep 10 06:25:11 nodebb systemd[1]: Finished PostgreSQL RDBMS.
第 3 步 - 配置 PostgreSQL
我们需要为 Postgres 默认的超级管理员用户 postgres 设置密码。首先,登录到 Postgres Shell。
$ sudo -u postgres psql
输入以下命令来修改密码。
postgres=# \password postgres
系统会提示你输入新密码。
Enter new password for user "postgres":
Enter it again:
为 NodeBB 创建一个新用户。
postgres=# CREATE ROLE nbbuser WITH LOGIN ENCRYPTED PASSWORD 'YourNodeBBPassword';
为 NodeBB 创建一个新数据库。
postgres=# CREATE DATABASE nodebbdb OWNER nbbuser;
输入 \q 退出 Shell。
postgres=# \q
第 4 步 - 安装 Node.js
由于 NodeBB 论坛是基于 Node.js 框架编写的,因此我们需要安装它才能使其正常运行。
执行以下命令来安装 Node.js 的 LTS(v16.x)版本。
$ curl -sL https://deb.nodesource.com/setup_lts.x | sudo -E bash -
$ sudo apt install nodejs
验证 Node.js 和 NPM 的安装。
$ node -v
v16.17.0
$ npm -v
8.15.0
第 5 步 - 安装 Git
在继续安装 NodeBB 之前,我们需要先安装 Git。运行以下命令来安装 Git。
$ sudo apt install git
运行以下命令完成 Git 的初始化配置。
$ git config --global user.name "Your Name"
$ git config --global user.email "
[email protected]
"
第 6 步 - 安装 NodeBB
不建议以 root 用户运行 NodeBB。请创建一个无密码的普通系统用户。
$ sudo adduser nodebb --disabled-password
其他选项直接回车跳过即可。
创建 NodeBB 论坛所在的目录。
$ sudo mkdir /var/www/html/nodebb -p
将该文件夹的所有权更改为新创建的用户。
$ sudo chown -R nodebb:nodebb /var/www/html/nodebb
登录到新创建的用户。
$ sudo su - nodebb
切换到 NodeBB 的安装目录。
$ cd /var/www/html/nodebb
要安装 NodeBB,首先需要克隆它的 GitHub 仓库。
将 NodeBB 克隆到 /var/www/nodebb 目录。命令末尾的点(.)表示当前目录。
$ git clone -b v2.x https://github.com/NodeBB/NodeBB.git .
这里我们克隆了 NodeBB 的 v2.x 分支,该分支包含了 NodeBB 的最新稳定版本。你可以从 NodeBB 的 Latest Branches 页面找到最新的稳定分支。
NodeBB 自带一个命令行工具。使用以下命令来安装 NodeBB。
$ ./nodebb setup
你可以直接按回车键选择默认值。
2022-09-10T10:10:27.957Z [2633] - info: NodeBB Setup Triggered via Command Line

Welcome to NodeBB v2.5.2!

This looks like a new installation, so you'll have to answer a few questions about your environment before we can proceed.
Press enter to accept the default setting (shown in brackets).
URL used to access this NodeBB (http://localhost:4567) https://forum.example.com
Please enter a NodeBB secret (44fd62bc-5047-4414-a4ca-83105740b624)
Would you like to submit anonymous plugin usage to nbbpm? (yes) no
Which database to use (mongo) postgres
2022-09-10T10:10:43.237Z [2633] - info:
Now configuring postgres database:
Host IP or address of your PostgreSQL instance (127.0.0.1)
Host port of your PostgreSQL instance (5432)
PostgreSQL username nbbuser
Password of your PostgreSQL database
PostgreSQL database name (nodebb) nodebbdb
Enable SSL for PostgreSQL database access (false)
........
关于“访问本 NodeBB 所使用的 URL”,请选择你最终用于访问论坛的地址。如果你将通过服务器 IP 访问论坛,则输入该 IP,或输入论坛的完整域名。这里我们将输入 https://forum.example.com。关于是否提交匿名插件使用情况的问题,选择 no。数据库类型输入 postgres。
接着按回车选择默认的 Host IP 和端口,并输入你的 PostgreSQL 用户名(即 nbbuser)以及你之前在配置 MongoDB 时为该用户名设置的密码(注:原文此处误写为 MongoDB,实际应为 PostgreSQL 密码)。数据库应选择 nodebbdb。
系统还会要求你创建一个管理员用户及其相关信息。
.....
2022-09-10T10:11:14.121Z [2633] - warn: No administrators have been detected, running initial user setup

Administrator username navjot
Administrator email address
[email protected]

Password
Confirm Password
.....
....
2022-09-10T10:14:28.160Z [2633] - info: [build] Asset compilation successful. Completed in 118.777sec.

     =================================================================================================================================================================

NodeBB Setup Completed. Run "./nodebb start" to manually start your NodeBB server.
设置完成后,运行以下命令启动 NodeBB。
$ ./nodebb start
Starting NodeBB
  "./nodebb stop" to stop the NodeBB server
  "./nodebb log" to view server output
  "./nodebb help" for more commands
退出 NodeBB 用户。
$ exit
第 7 步 - 将 NodeBB 作为系统服务运行
NodeBB 服务在系统重启后不会自动运行。为了避免每次都手动启动 NodeBB,我们需要将其安装为系统服务。
首先停止 NodeBB 服务。切换到 NodeBB 目录,然后使用 sudo -u 命令直接运行该命令。
$ cd /var/www/html/nodebb
$ sudo -u nodebb ./nodebb stop
运行以下命令创建并编辑 nodebb.service 这个 systemd 单元配置文件。
$ sudo nano /etc/systemd/system/nodebb.service
在编辑器中粘贴以下代码。
[Unit]
Description=NodeBB
Documentation=https://docs.nodebb.org
After=system.slice multi-user.target postgresql.service

[Service]
Type=simple
User=nodebb

StandardError=syslog
SyslogIdentifier=nodebb

Environment=NODE_ENV=production
WorkingDirectory=/var/www/html/nodebb
ExecStart=/usr/bin/env node loader.js --no-silent --no-daemon
Restart=always

[Install]
WantedBy=multi-user.target
这里我们使用的用户名是 nodebb(即我们在第 6 步创建的用户),路径则是我们选择安装 NodeBB 的位置。
启用 NodeBB 服务。
$ sudo systemctl enable nodebb
启动 NodeBB 服务。
$ sudo systemctl start nodebb
检查服务的状态。
$ sudo systemctl status nodebb
? nodebb.service - NodeBB
     Loaded: loaded (/etc/systemd/system/nodebb.service; enabled; vendor preset: enabled)
     Active: active (running) since Sun 2022-09-11 21:41:07 UTC; 2s ago
       Docs: https://docs.nodebb.org
   Main PID: 26844 (node)
      Tasks: 18 (limit: 2237)
     Memory: 94.1M
        CPU: 2.114s
     CGroup: /system.slice/nodebb.service
             ??26844 node loader.js --no-silent --no-daemon
             ??26855 /usr/bin/node /var/www/html/nodebb/app.js

Sep 11 21:41:07 forum systemd[1]: Started NodeBB.
Sep 11 21:41:07 forum nodebb[26844]: NodeBB v2.5.2 Copyright (C) 2013-2022 NodeBB Inc.
Sep 11 21:41:07 forum nodebb[26844]: This program comes with ABSOLUTELY NO WARRANTY.
Sep 11 21:41:07 forum nodebb[26844]: This is free software, and you are welcome to redistribute it under certain conditions.
Sep 11 21:41:07 forum nodebb[26844]: For the full license, please visit: http://www.gnu.org/copyleft/gpl.html
Sep 11 21:41:07 forum nodebb[26844]: Clustering enabled: Spinning up 1 process(es).
Sep 11 21:41:08 forum nodebb[26855]: 2022-09-11T21:41:08.002Z [4567/26855] - info: Initializing NodeBB v2.5.2 https://forum.example.com
第 8 步 - 安装 Nginx
Ubuntu 22.04 自带的是较旧版本的 Nginx。要安装最新版本,你需要添加 Nginx 的官方仓库。
导入 Nginx 的签名密钥。
$ curl https://nginx.org/keys/nginx_signing.key | gpg --dearmor \
| sudo tee /usr/share/keyrings/nginx-archive-keyring.gpg >/dev/null
添加 Nginx 稳定版的仓库。
$ echo "deb [signed-by=/usr/share/keyrings/nginx-archive-keyring.gpg arch=amd64] \
http://nginx.org/packages/ubuntu `lsb_release -cs` nginx" \
| sudo tee /etc/apt/sources.list.d/nginx.list
更新系统软件源。
$ sudo apt update
安装 Nginx。
$ sudo apt install nginx
验证安装。
$ nginx -v
nginx version: nginx/1.22.0
启动 Nginx 服务器。
$ sudo systemctl start nginx
第 9 步 - 安装 SSL
我们需要安装 Certbot 来生成 SSL 证书。你可以通过 Ubuntu 的仓库安装 Certbot,也可以使用 Snapd 工具获取最新版本。本教程将使用 Snapd 版本。
Ubuntu 22.04 默认已安装 Snapd。运行以下命令,确保你的 Snapd 版本是最新的。
$ sudo snap install core
$ sudo snap refresh core
安装 Certbot。
$ sudo snap install --classic certbot
运行以下命令,通过创建指向 /usr/bin 目录的符号链接,确保 Certbot 命令可以直接运行。
$ sudo ln -s /snap/bin/certbot /usr/bin/certbot
运行以下命令生成 SSL 证书。
$ sudo certbot certonly --nginx --agree-tos --no-eff-email --staple-ocsp --preferred-challenges http -m
[email protected]
 -d forum.example.com
上述命令会将证书下载到服务器上的 /etc/letsencrypt/live/forum.example.com 目录。
生成 Diffie-Hellman 组证书。
$ sudo openssl dhparam -dsaparam -out /etc/ssl/certs/dhparam.pem 4096
要检查 SSL 证书续期是否正常工作,可以执行一次演练(dry run)。
$ sudo certbot renew --dry-run
如果没有看到任何错误,说明一切就绪。你的证书将自动续期。
第 10 步 - 配置 Nginx
打开 /etc/nginx/nginx.conf 文件进行编辑。
$ sudo nano /etc/nginx/nginx.conf
在 include /etc/nginx/conf.d/*.conf; 这一行之前添加以下行。
server_names_hash_bucket_size 64;
按下 Ctrl + X 保存文件,并在提示时输入 Y 确认。
创建并打开 /etc/nginx/conf.d/nodebb.conf 文件进行编辑。
$ sudo nano /etc/nginx/conf.d/nodebb.conf
在其中粘贴以下代码。请将 forum.example.com 替换为你的域名。确保 client_max_body_size 的值设置为 25MB,以设定论坛的上传大小限制。
server {
  listen 80 default_server;
  server_name forum.example.com;
  return 301 https://$server_name$request_uri;
}

server {
   listen 443 ssl http2;
   server_name forum.example.com;

   http2_push_preload on; # Enable HTTP/2 Server Push

   ssl_certificate /etc/letsencrypt/live/forum.example.com/fullchain.pem;
   ssl_certificate_key /etc/letsencrypt/live/forum.example.com/privkey.pem;
   ssl_trusted_certificate /etc/letsencrypt/live/forum.example.com/chain.pem;
   ssl_session_timeout 1d;

   # Enable TLS versions (TLSv1.3 is required upcoming HTTP/3 QUIC).
   ssl_protocols TLSv1.2 TLSv1.3;

   # Enable TLSv1.3's 0-RTT. Use $ssl_early_data when reverse proxying to
   # prevent replay attacks.
   #
   # @see: https://nginx.org/en/docs/http/ngx_http_ssl_module.html#ssl_early_data
   ssl_early_data on;

   ssl_ciphers 'ECDHE-ECDSA-AES256-GCM-SHA384:ECDHE-RSA-AES256-GCM-SHA384:ECDHE-ECDSA-CHACHA20-POLY1305:ECDHE-RSA-CHACHA20-POLY1305:ECDHE-ECDSA-AES256-SHA384:ECDHE-RSA-AES256-SHA384';
   ssl_prefer_server_ciphers on;
   ssl_session_cache shared:SSL:50m;

   # OCSP Stapling ---
   # fetch OCSP records from URL in ssl_certificate and cache them
   ssl_stapling on;
   ssl_stapling_verify on;
   ssl_dhparam /etc/ssl/certs/dhparam.pem;
   client_max_body_size 25M;

   gzip            on;
   gzip_min_length 1000;
   gzip_proxied    off;
   gzip_types      text/plain application/xml text/javascript application/javascript application/x-javascript text/css application/json;

   add_header X-Early-Data $tls1_3_early_data;

   location / {
       # Socket.IO Support
       proxy_set_header Connection "upgrade";
       proxy_set_header Upgrade $http_upgrade;
       proxy_http_version 1.1;

       proxy_set_header Host $http_host;
       proxy_set_header X-Real-IP $remote_addr;
       proxy_set_header X-Forwarded-For $proxy_add_x_forwarded_for;
       proxy_set_header X-Forwarded-Proto $scheme;
       proxy_set_header X-NginX-Proxy true;
       proxy_set_header X-Frame-Options SAMEORIGIN;

       proxy_pass http://127.0.0.1:4567;  # no trailing slash
       proxy_redirect off;
   }

   location @nodebb {
       proxy_pass http://127.0.0.1:4567;
   }

   location ~ ^/assets/(.*) {
       root /var/www/html/nodebb/;
       try_files /build/public/$1 /public/$1 @nodebb;
   }
}

# This block is useful for debugging TLS v1.3. Please feel free to remove this
# and use the `$ssl_early_data` variable exposed by NGINX directly should you
# wish to do so.
map $ssl_early_data $tls1_3_early_data {
  "~." $ssl_early_data;
  default "";
}
按下 Ctrl + X 保存文件,并在提示时输入 Y 确认。
验证你的 Nginx 配置。
$ sudo nginx -t
重启 Nginx 服务器。
$ sudo systemctl restart nginx
第 11 步 - 访问并配置论坛
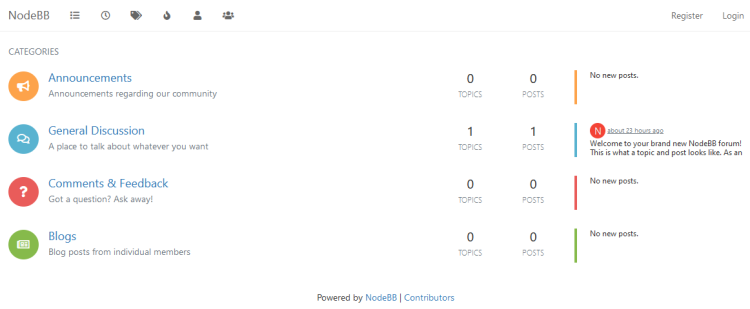
你可以在浏览器中访问 https://forum.example.com 来打开论坛,你将看到如下页面。
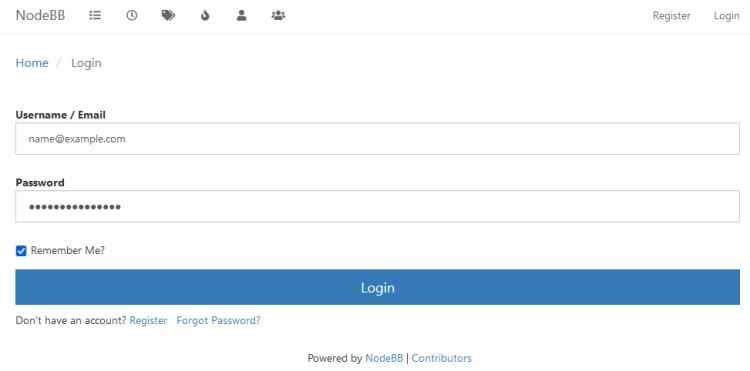
点击登录页面,输入你在第 6 步创建的管理员凭据。
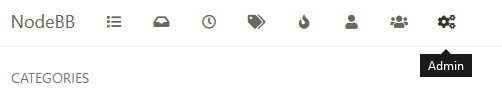
登录后,点击菜单栏最右侧的图标即可进入管理面板。
从这里开始,你可以管理论坛,并通过安装主题和插件来扩展其功能。
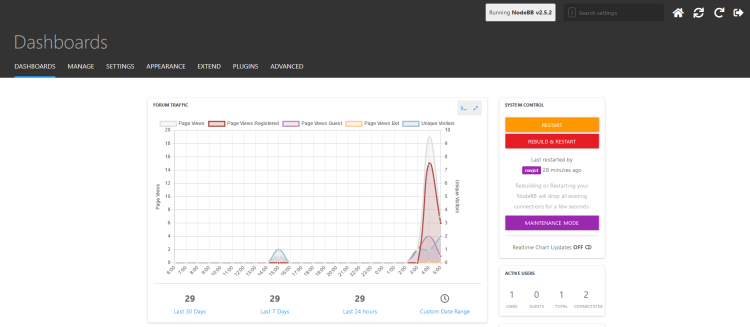
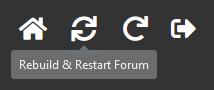
在安装任何主题和插件后,你必须使用管理面板右上角的按钮来重建并重启论坛,如下图所示。
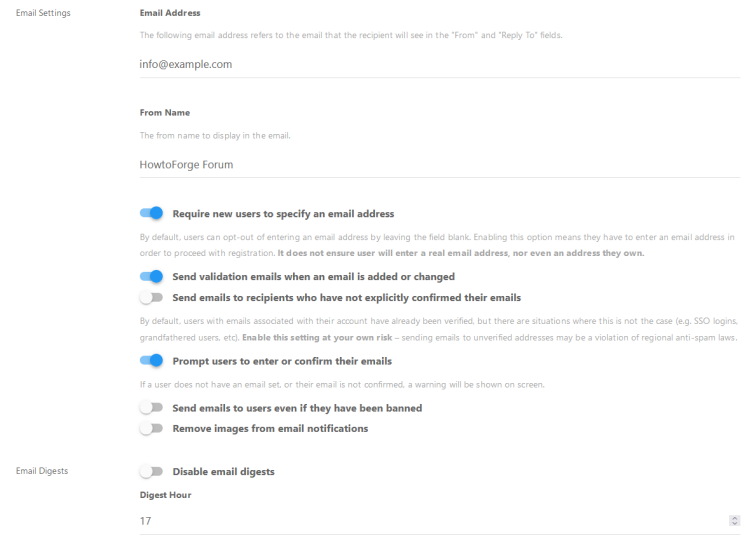
请务必配置邮件服务:依次进入 仪表盘 >> 设置 >> 邮件,以便论坛用户能够收到邮件。选择以下设置以确保获得最佳的邮件发送配置。
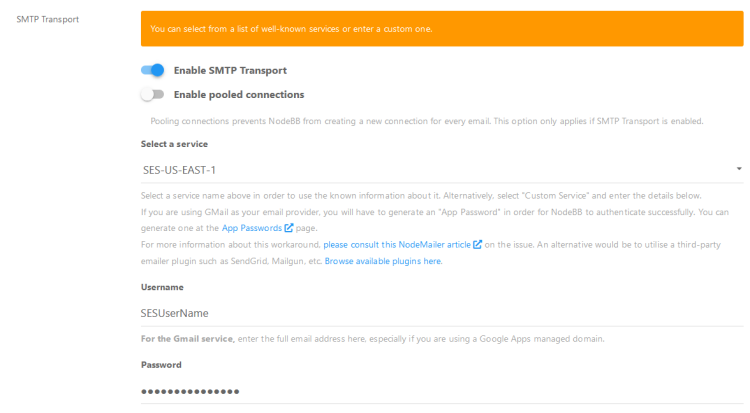
向下滚动页面,从下拉菜单中选择一个自定义邮件发送器(custom mailer);如果你的 SMTP 服务不在列表中,则使用 Custom mailer。在本教程中,我们使用的是 SES 服务。
点击右下角的软盘保存图标以保存设置。
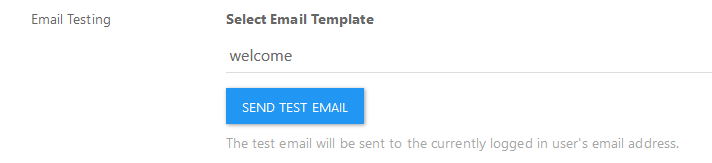
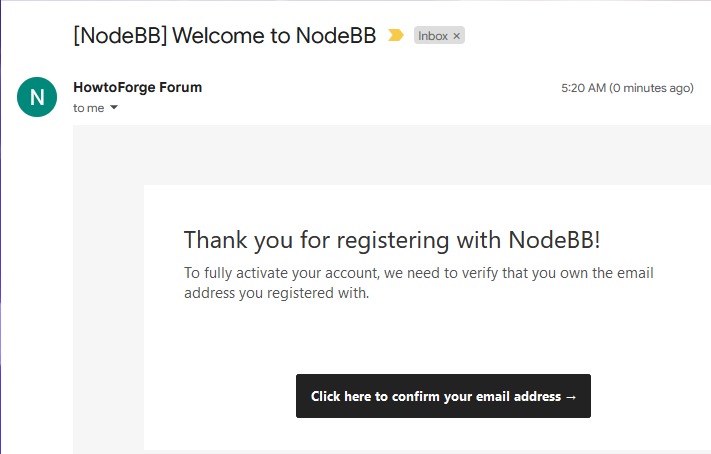
滚动到页面底部以发送一封测试邮件。默认情况下,它会发送一封“已封禁”邮件模板。你可以选择其他任何邮件模板进行测试。我们将发送欢迎邮件。
你将收到一封测试邮件,如下图所示,确认设置生效。
总结
至此,本教程关于在 Ubuntu 22.04 服务器上使用 PostgreSQL 数据库和 Nginx 安装 NodeBB 论坛的内容就结束了。如果你有任何问题,请在下方评论区留言。