
本教程适用于以下操作系统版本
- Ubuntu 22.04 (Jammy Jellyfish)
- Ubuntu 20.04 (Focal Fossa)
- Ubuntu 18.04 (Bionic Beaver)
- Ubuntu 11.04 (Natty Narwhal)
本页内容
- 先决条件
- 安装 Nginx、MariaDB 和 PHP
- 安装 phpMyAdmin
- 配置 MariaDB 数据库
- 为 phpMyAdmin 配置 Nginx
- 使用 Let's Encrypt SSL 加固 phpMyAdmin
- 访问 phpMyAdmin
- 结语
phpMyAdmin 是一款免费、开源、基于 Web 的应用程序,可通过 Web 浏览器管理数据库。它提供简洁易用的 Web 界面,帮助数据库管理员执行多种任务,包括管理用户账户与权限、导入和导出数据、执行 SQL 语句等。它使用 PHP 编写,使初学者也能够与 MySQL 数据库进行交互。
在本教程中,我们将介绍如何在 Ubuntu 22.04 上使用 Nginx 安装 phpMyAdmin。
先决条件
- 一台运行 Ubuntu 22.04 的服务器。
- 一个指向该服务器的有效域名。
- 服务器上已配置 root 密码。
安装 Nginx、MariaDB 和 PHP
首先,您需要在服务器上安装 Nginx Web 服务器、MariaDB、PHP 以及其他必需的 PHP 扩展。可以使用以下命令一次性安装:
apt-get install nginx mariadb-server php php-cli php-mysql php-mbstring php-zip php-gd php-json php-curl php-fpm -y所有软件包安装完成后,即可进入下一步。
安装 phpMyAdmin
默认情况下,Ubuntu 22.04 的默认软件仓库中已提供 phpMyAdmin 软件包。只需运行以下命令即可安装:
apt-get install phpmyadmin -y安装过程中,系统会要求您选择 Web 服务器,如下所示:
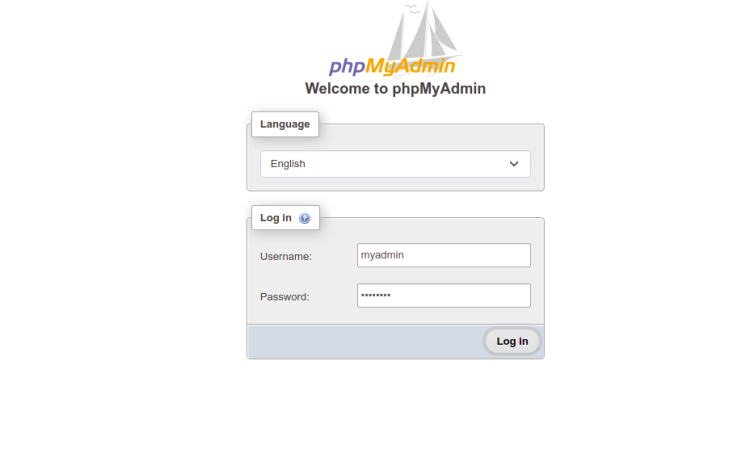
由于我们使用的是 Nginx Web 服务器,只需按 TAB 键,然后按 ENTER 键跳过此提示即可。随后系统会要求您为 phpMyAdmin 配置一个数据库。
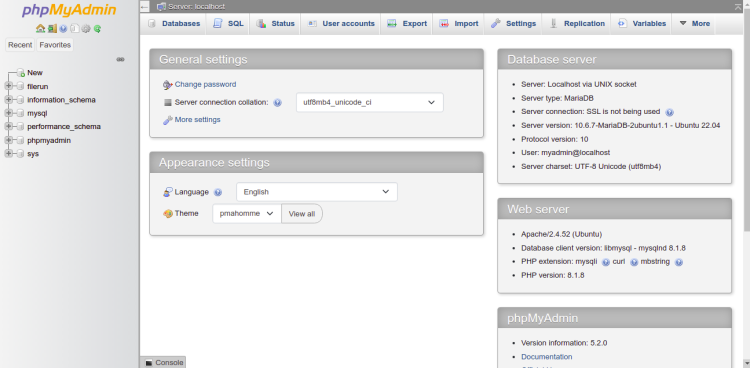
选择 Yes 并按 Enter 继续。系统会要求您为 phpMyAdmin 应用程序设置并确认密码,如下所示:
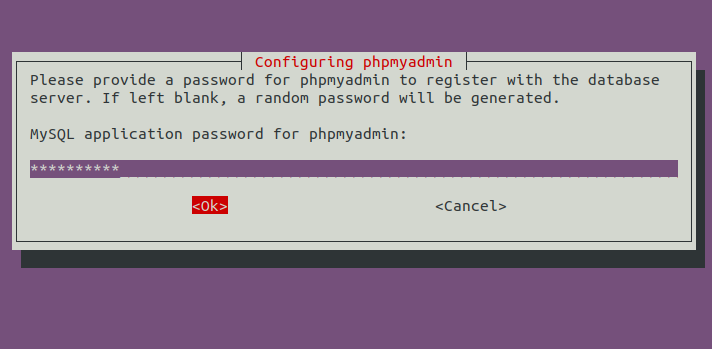
输入您想要的密码并按 Enter 完成安装。
配置 MariaDB 数据库
默认情况下,MariaDB 未进行安全配置。请使用以下命令加固 MariaDB 并设置 MariaDB 的 root 密码:
mysql_secure_installation按如下所示回答所有问题:
Enter current password for root (enter for none):
Set root password? [Y/n] Y
New password:
Re-enter new password:
Remove anonymous users? [Y/n] Y
Disallow root login remotely? [Y/n] Y
Remove test database and access to it? [Y/n] Y
Reload privilege tables now? [Y/n] Y
加固 MariaDB 之后,建议创建一个单独的用户,用于连接 phpMyAdmin 并管理数据库。
为此,请使用以下命令登录 MariaDB shell:
mysql -u root -p在提示时输入 root 密码,然后使用以下命令创建新用户:
MariaDB [(none)]> create user admin@localhost identified by 'password';接下来,使用以下命令为该用户授予所有权限:
MariaDB [(none)]> grant all privileges on *.* to admin@localhost with grant option;接下来,使用以下命令刷新权限并退出 MariaDB shell:
MariaDB [(none)]> flush privileges;
MariaDB [(none)]> exit;
完成后,即可进入下一步。
为 phpMyAdmin 配置 Nginx
接下来,您需要创建一个 Nginx 虚拟主机服务器块来承载 phpMyAdmin。可以使用以下命令创建:
nano /etc/nginx/conf.d/phpmyadmin.conf添加以下内容:
server {
  listen 80;
  listen [::]:80;
  server_name phpmyadmin.example.com;
  root /usr/share/phpmyadmin/;
  index index.php index.html index.htm index.nginx-debian.html;

  access_log /var/log/nginx/phpmyadmin_access.log;
  error_log /var/log/nginx/phpmyadmin_error.log;

  location / {
    try_files $uri $uri/ /index.php;
  }

  location ~ ^/(doc|sql|setup)/ {
    deny all;
  }

  location ~ \.php$ {
    fastcgi_pass unix:/run/php/php8.1-fpm.sock;
    fastcgi_param SCRIPT_FILENAME $document_root$fastcgi_script_name;
    include fastcgi_params;
    include snippets/fastcgi-php.conf;
  }

  location ~ /\.ht {
    deny all;
  }
}
保存并关闭文件。然后使用以下命令检查 Nginx 是否存在语法错误:
nginx -t您将看到如下输出:
nginx: the configuration file /etc/nginx/nginx.conf syntax is ok
nginx: configuration file /etc/nginx/nginx.conf test is successful
最后,重启 Nginx 服务以使更改生效:
systemctl restart nginx也可以使用以下命令查看 Nginx 状态:
systemctl status nginx您将看到如下输出:
? nginx.service - A high performance web server and a reverse proxy server
     Loaded: loaded (/lib/systemd/system/nginx.service; enabled; vendor preset: enabled)
     Active: active (running) since Sun 2022-06-12 04:37:05 UTC; 6s ago
       Docs: man:nginx(8)
    Process: 20020 ExecStartPre=/usr/sbin/nginx -t -q -g daemon on; master_process on; (code=exited, status=0/SUCCESS)
    Process: 20021 ExecStart=/usr/sbin/nginx -g daemon on; master_process on; (code=exited, status=0/SUCCESS)
   Main PID: 20022 (nginx)
      Tasks: 2 (limit: 2292)
     Memory: 2.6M
        CPU: 33ms
     CGroup: /system.slice/nginx.service
             ??20022 "nginx: master process /usr/sbin/nginx -g daemon on; master_process on;"
             ??20023 "nginx: worker process" "" "" "" "" "" "" "" "" "" "" "" "" "" "" "" "" "" "" "" "" "" "" "" "" "" "" ""

Jun 12 04:37:05 ubuntu systemd[1]: Starting A high performance web server and a reverse proxy server...
Jun 12 04:37:05 ubuntu systemd[1]: Started A high performance web server and a reverse proxy server.
接下来,更改 phpMyAdmin 目录的所有者和权限:
chown -R www-data:www-data /usr/share/phpmyadmin/
chmod -R 755
使用 Let's Encrypt SSL 加固 phpMyAdmin
开始之前,您需要安装 Certbot 客户端,用于下载并安装 Let's Encrypt SSL 证书。
首先,使用以下命令添加 Certbot 软件仓库:
add-apt-repository ppa:ahasenack/certbot-tlssni01-1875471接下来,使用以下命令更新软件仓库并安装 Certbot 客户端:
apt-get update -y
apt-get install certbot python3-certbot-nginx -y
Certbot 安装完成后,运行以下命令为您的域名下载并安装 Let's Encrypt SSL 证书:
certbot --nginx -d phpmyadmin.example.com系统将要求您提供邮箱地址并接受服务条款,如下所示:
Saving debug log to /var/log/letsencrypt/letsencrypt.log
Plugins selected: Authenticator nginx, Installer nginx
Enter email address (used for urgent renewal and security notices) (Enter 'c' to
cancel):
[email protected]


- - - - - - - - - - - - - - - - - - - - - - - - - - - - - - - - - - - - - - - -
Please read the Terms of Service at
https://letsencrypt.org/documents/LE-SA-v1.2-November-15-2017.pdf. You must
agree in order to register with the ACME server at
https://acme-v02.api.letsencrypt.org/directory
- - - - - - - - - - - - - - - - - - - - - - - - - - - - - - - - - - - - - - - -
(A)gree/(C)ancel: A

- - - - - - - - - - - - - - - - - - - - - - - - - - - - - - - - - - - - - - - -
Would you be willing to share your email address with the Electronic Frontier
Foundation, a founding partner of the Let's Encrypt project and the non-profit
organization that develops Certbot? We'd like to send you email about our work
encrypting the web, EFF news, campaigns, and ways to support digital freedom.
- - - - - - - - - - - - - - - - - - - - - - - - - - - - - - - - - - - - - - - -
(Y)es/(N)o: Y

Obtaining a new certificate
Performing the following challenges:
http-01 challenge for phpmyadmin.example.com
Waiting for verification...
Cleaning up challenges
Deploying Certificate to VirtualHost /etc/nginx/sites-enabled/phpmyadmin
接下来,选择是否将 HTTP 流量重定向到 HTTPS:
Please choose whether or not to redirect HTTP traffic to HTTPS, removing HTTP access.
- - - - - - - - - - - - - - - - - - - - - - - - - - - - - - - - - - - - - - - -
1: No redirect - Make no further changes to the webserver configuration.
2: Redirect - Make all requests redirect to secure HTTPS access. Choose this for
new sites, or if you're confident your site works on HTTPS. You can undo this
change by editing your web server's configuration.
- - - - - - - - - - - - - - - - - - - - - - - - - - - - - - - - - - - - - - - -
Select the appropriate number [1-2] then [enter] (press 'c' to cancel): 2
输入 2 并按 Enter 完成安装。
Redirecting all traffic on port 80 to ssl in /etc/nginx/sites-enabled/phpmyadmin

- - - - - - - - - - - - - - - - - - - - - - - - - - - - - - - - - - - - - - - -
Congratulations! You have successfully enabled https://phpmyadmin.example.com

You should test your configuration at:
https://www.ssllabs.com/ssltest/analyze.html?d=phpmyadmin.example.com
- - - - - - - - - - - - - - - - - - - - - - - - - - - - - - - - - - - - - - - -

IMPORTANT NOTES:
 - Congratulations! Your certificate and chain have been saved at:
   /etc/letsencrypt/live/phpmyadmin.example.com/fullchain.pem
   Your key file has been saved at:
   /etc/letsencrypt/live/phpmyadmin.example.com/privkey.pem
   Your cert will expire on 2022-09-12. To obtain a new or tweaked
   version of this certificate in the future, simply run certbot again
   with the "certonly" option. To non-interactively renew *all* of
   your certificates, run "certbot renew"
 - If you like Certbot, please consider supporting our work by:

   Donating to ISRG / Let's Encrypt:   https://letsencrypt.org/donate
   Donating to EFF:                    https://eff.org/donate-le
访问 phpMyAdmin
现在,打开 Web 浏览器并输入 URL https://phpmyadmin.eample.com 。您将被重定向到 phpMyAdmin 登录页面:
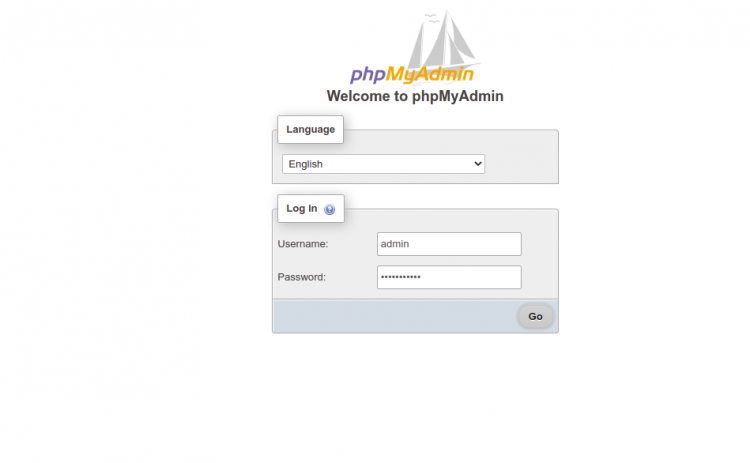
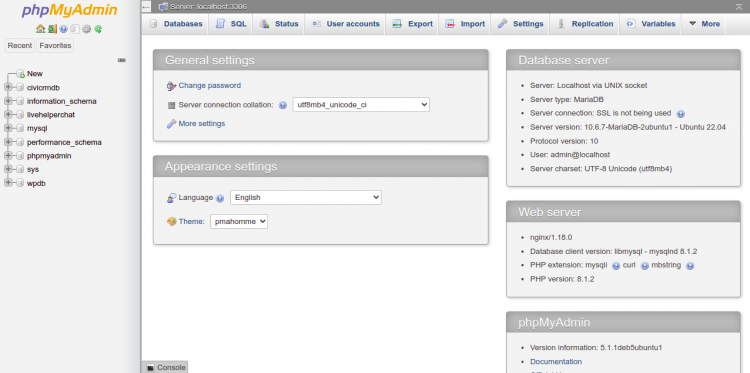
输入管理员用户名和密码,然后点击 Go 按钮。您将在以下页面看到 phpMyAdmin 默认仪表板:
结语
恭喜!您已在 Ubuntu 22.04 上成功安装 phpMyAdmin 并使用 Let's Encrypt SSL 对其进行了加固。现在您可以通过 Web 浏览器连接 phpMyAdmin、管理数据库并执行多种任务。