
本页内容
- 前提条件
- 第 1 步:在您的服务器上安装桌面 GUI
- 第 2 步:安装 TigerVNC Server
- 第 3 步:创建 VNC 用户凭据
- 第 4 步:创建 VNC Systemd Unit 文件
- 第 5 步:启动 VNC Server
- 第 6 步:配置防火墙
- 第 7 步:创建到 CentOS / Rocky Linux / AlmaLinux 服务器的 VNC 连接 使用 VNC 访问您的计算机
- 第 8 步:创建到远程 Ubuntu/Debian 服务器的 VNC 连接 创建 SSH 隧道 使用 VNC 访问您的计算机
- 结论
- 使用 VNC 访问您的计算机
- 创建 SSH 隧道
- 使用 VNC 访问您的计算机
最近,您学习了如何在基于 Rocky Linux 8 的服务器上安装并使用 Apache Guacamole 来创建 SSH 连接。Guacamole 最流行的用途之一是将其用作 VNC(Virtual Network Computing)查看器。借助 VNC,您可以从任何地方访问您的桌面或服务器,而无需安装任何第三方客户端。
在本教程中,您将学习如何在 Linux 服务器上安装 VNC,并使用 Guacamole 创建 VNC 连接。我们将涵盖所有常见的发行版,并在需要的地方指出差异。
前提条件
- 一台运行 Rocky Linux、CentOS、AlmaLinux、Ubuntu 或 Debian 的服务器。
- 应已安装 Apache Guacamole。请参照我们的相关教程。
- 您要连接的服务器上应有一个具有 sudo 权限的非 root 用户。
- 远程服务器至少需要 2 个 CPU 核心和 4GB RAM,以获得流畅的 VNC 连接。
- 请确保所有内容均已更新。CentOS / Rocky Linux / AlmaLinux $ sudo dnf update Ubuntu / Debian $ sudo apt update && sudo apt upgrade
- 安装基础实用软件包。其中一些可能已经安装。CentOS / Rocky Linux / AlmaLinux $ sudo dnf install wget curl nano unzip yum-utils -y Ubuntu / Debian $ sudo apt install wget curl nano unzip -y
一台运行 Rocky Linux、CentOS、AlmaLinux、Ubuntu 或 Debian 的服务器。
应已安装 Apache Guacamole。请参照我们的相关教程。
您要连接的服务器上应有一个具有 sudo 权限的非 root 用户。
远程服务器至少需要 2 个 CPU 核心和 4GB RAM,以获得流畅的 VNC 连接。
请确保所有内容均已更新。
CentOS / Rocky Linux / AlmaLinux
$ sudo dnf update
Ubuntu / Debian
$ sudo apt update && sudo apt upgrade
安装基础实用软件包。其中一些可能已经安装。
CentOS / Rocky Linux / AlmaLinux
$ sudo dnf install wget curl nano unzip yum-utils -y
Ubuntu / Debian
$ sudo apt install wget curl nano unzip -y
第 1 步:在您的服务器上安装桌面 GUI
在本教程中,我们将安装 Xfce 图形环境。不过,您也可以选择安装任何您喜欢的环境。运行以下命令来安装 GUI。
CentOS / Rocky Linux / AlmaLinux
$ sudo dnf install -y epel-release
$ sudo dnf groupinstall -y "Xfce" "base-x"
$ sudo systemctl set-default graphical
$ sudo reboot
如果您一直按照我们的 Apache Guacamole 教程操作,EPEL 仓库已经安装好了,因此可以跳过第一条命令。第二条命令安装实际的图形环境和库,第三条命令将 GUI 环境设为默认。您需要重启服务器才能使安装生效。
Ubuntu / Debian
$ sudo apt install xfce4 xfce4-goodies
$ sudo systemctl set-default graphical
$ sudo reboot
第 2 步:安装 TigerVNC Server
有许多 VNC 服务器应用程序可供您选择安装到系统上。在本教程中,我们将安装 TigerVNC 服务器软件。
运行以下命令来安装 TigerVNC 服务器。
CentOS / Rocky Linux / AlmaLinux
$ sudo dnf install tigervnc-server
Ubuntu / Debian
$ sudo apt install tigervnc-standalone-server
第 3 步:创建 VNC 用户凭据
下一步是为 VNC 创建一个系统用户,连接将通过该用户建立。
CentOS / Rocky Linux / AlmaLinux
运行以下命令来创建一个新用户并设置密码。将 vncuser 替换为您选择的用户名。
$ sudo adduser vncuser
$ sudo passwd vncuser
下一步是创建一个访问密码,用于从 VNC 客户端连接到您计算机上的服务器。
切换到 vncuser。
$ sudo su - vncuser
设置 VNC 访问密码。
$ vncpasswd
Password:
Verify:
Would you like to enter a view-only password (y/n)? y
Password:
Verify:
系统将要求您创建密码并进行确认。接着,系统会询问您是否要创建仅查看密码。如果您想将 VNC 访问限制为仅查看系统,并禁止使用鼠标或键盘进行任何交互,仅查看密码会很有用。如果要设置此类密码请输入 y,输入 n 则结束该过程。
退出 vncuser shell。
$ exit
Ubuntu / Debian
运行以下命令来创建一个新用户并设置密码。将 vncuser 替换为您选择的用户名。
$ sudo adduser vncuser
Adding user `vncuser' ...
Adding new group `vncuser' (1001) ...
Adding new user `vncuser' (1001) with group `vncuser' ...
Creating home directory `/home/vncuser' ...
Copying files from `/etc/skel' ...
New password:
Retype new password:
passwd: password updated successfully
Changing the user information for vncuser
Enter the new value, or press ENTER for the default
        Full Name []:
        Room Number []:
        Work Phone []:
        Home Phone []:
        Other []:
Is the information correct? [Y/n] y
切换到 vncuser。
$ sudo su - vncuser
设置 VNC 访问密码。
$ vncpasswd
Password:
Verify:
Would you like to enter a view-only password (y/n)? y
Password:
Verify:
我们需要配置 TigerVNC 的启动文件以使用 Xfce。
打开文件 ~/.vnc/xstartup 进行编辑。
$ sudo nano ~/.vnc/xstartup
将以下代码粘贴进去。
#!/bin/sh
unset SESSION_MANAGER
unset DBUS_SESSION_BUS_ADDRESS
exec startxfce4
按 Ctrl + X,并在提示保存时输入 Y 来保存文件。
您可以通过 ~/.vnc/config 文件为 VNC 配置其他选项。创建并打开该文件进行编辑。
$ sudo nano ~/.vnc/config
将以下代码粘贴进去。
geometry=1024x768
dpi=96
depth=24
按 Ctrl + X,并在提示保存时输入 Y 来保存文件。
测试 VNC 服务器。
$ vncserver
/usr/bin/xauth:  file /home/vncuser/.Xauthority does not exist


New 'vncdesktop:1 (vncuser)' desktop at :1 on machine vncdesktop

Starting applications specified in /home/vncuser/.vnc/xstartup
Log file is /home/vncuser/.vnc/vncdesktop:1.log

Use xtigervncviewer -SecurityTypes VncAuth -passwd /home/vncuser/.vnc/passwd :1 to connect to the VNC server.
您可以使用以下命令获取所有当前 VNC 会话的列表。
$ vncserver -list
TigerVNC server sessions:

X DISPLAY #     RFB PORT #      PROCESS ID
:1              5901            1029
接下来,我们需要终止该进程,因为下一步我们将为它创建一个服务文件。
$ vncserver -kill :1
Killing Xtigervnc process ID 1029... success!
退出用户 shell。
$ exit
第 4 步:创建 VNC Systemd Unit 文件
CentOS / Rocky Linux / AlmaLinux
TigerVNC 的 systemd 服务单元文件位于 /lib/systemd/system 目录中。将该文件复制到 /etc/systemd/system 目录。
$ sudo cp /lib/systemd/system/
[email protected]
 /etc/systemd/system/vncserver@:1.service
VNC 服务器默认运行在端口 5900。每个用户都应在单独的端口上运行其 VNC 服务器实例。命令末尾的数字 :1 指示 VNC 在端口 5900 的子端口上运行服务。因此 :1 对应端口 5900,:2 对应端口 5902,依此类推。
不仅 VNC 需要知道运行服务所用的端口号,您还需要指定哪个用户将在哪个端口号下运行服务器。您可以通过编辑 /etc/tigervnc/vncserver.users 文件来配置。打开它进行编辑。
$ sudo nano /etc/tigervnc/vncserver.users
在 # :2=andrew 的正前面输入值 :1=vncuser,使其看起来如下所示。
# TigerVNC User assignment
#
# This file assigns users to specific VNC display numbers.
# The syntax is <display>=<username>. E.g.:
#
  :1=vncuser
# :2=andrew
# :3=lisa
按 Ctrl + X,并在提示保存时输入 Y 来保存文件。
Ubuntu / Debian
安装程序在 Ubuntu 或 Debian 系统上不会安装 systemd 服务文件。您需要手动创建它。创建并打开 TigerVNC 的 systemd 单元文件。
$ sudo nano /etc/systemd/system/
[email protected]
将以下代码粘贴进去。
[Unit]
Description=Remote desktop service (VNC)
After=syslog.target network.target

[Service]
Type=simple
User=vncuser
PAMName=login
PIDFile=/home/%u/.vnc/%H%i.pid
ExecStartPre=/bin/sh -c '/usr/bin/vncserver -kill :%i > /dev/null 2>&1 || :'
ExecStart=/usr/bin/vncserver :%i -geometry 1440x900 -alwaysshared -fg
ExecStop=/usr/bin/vncserver -kill :%i

[Install]
WantedBy=multi-user.target
按 Ctrl + X,并在提示保存时输入 Y 来保存文件。
下一步对所有 Linux 发行版都是通用的。
重新加载 systemd daemon 以激活该服务。
$ sudo systemctl daemon-reload
第 5 步:启动 VNC Server
CentOS / Rocky Linux / AlmaLinux
启动 VNC 服务器服务。
$ sudo systemctl start vncserver@:1
如果您希望该服务在系统重启后继续运行,可以启用它。
$ sudo systemctl enable vncserver@:1
检查该服务的状态。
$ sudo systemctl status vncserver@:1
? vncserver@:1.service - Remote desktop service (VNC)
   Loaded: loaded (/etc/systemd/system/vncserver@:1.service; disabled; vendor preset: disabled)
   Active: active (running) since Wed 2022-03-16 01:16:18 UTC; 6s ago
  Process: 6777 ExecStart=/usr/libexec/vncsession-start :1 (code=exited, status=0/SUCCESS)
 Main PID: 6784 (vncsession)
    Tasks: 0 (limit: 11179)
   Memory: 1.1M
   CGroup: /system.slice/system-vncserver.slice/vncserver@:1.service
           ? 6784 /usr/sbin/vncsession vncuser :1

Mar 16 01:16:18 guacamole systemd[1]: Starting Remote desktop service (VNC)...
Mar 16 01:16:18 guacamole systemd[1]: Started Remote desktop service (VNC).
Ubuntu / Debian
启动 VNC 服务器服务。
$ sudo systemctl start
[email protected]
启用 VNC 服务。
$ sudo systemctl enable
[email protected]
检查该服务的状态。
$ sudo systemctl status
[email protected]

?
[email protected]
 - Remote desktop service (VNC)
     Loaded: loaded (/etc/systemd/system/
[email protected]
; enabled; vendor preset: enabled)
     Active: active (running) since Sat 2022-03-19 09:42:28 UTC; 6s ago
    Process: 1420 ExecStartPre=/bin/sh -c /usr/bin/vncserver -kill :1 > /dev/null 2>&1 || : (code=exited, status=0/SUCCESS)
   Main PID: 1455 (vncserver)
      Tasks: 0 (limit: 4686)
     Memory: 884.0K
     CGroup: /system.slice/system-vncserver.slice/
[email protected]

             ? 1455 /usr/bin/perl /usr/bin/vncserver :1 -geometry 1440x900 -alwaysshared -fg

Mar 19 09:42:28 vncdesktop systemd[1]: Starting Remote desktop service (VNC)...
Mar 19 09:42:28 vncdesktop systemd[1420]: pam_unix(login:session): session opened for user vncuser by (uid=0)
Mar 19 09:42:28 vncdesktop systemd[1]: Started Remote desktop service (VNC).
Mar 19 09:42:29 vncdesktop systemd[1455]: pam_unix(login:session): session opened for user vncuser by (uid=0)
第 6 步:配置防火墙
要使 VNC 可通过网络访问,我们需要开放其端口。
CentOS / Rocky Linux / AlmaLinux
运行以下命令开放 VNC 端口并重新加载防火墙。
$ sudo firewall-cmd --permanent --add-service=vnc-server
$ sudo firewall-cmd --reload
Ubuntu / Debian
$ sudo ufw allow 5901:5910/tcp
$ sudo ufw reload
第 7 步:创建到 CentOS / Rocky Linux / AlmaLinux 服务器的 VNC 连接
打开您的 Guacamole URL,输入凭据进行登录。
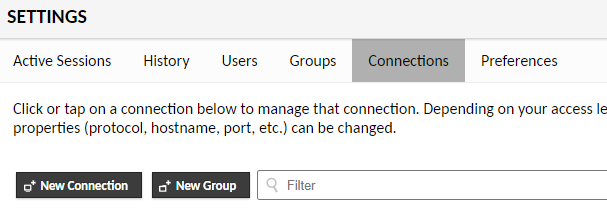
访问 Guacamole Settings 下的 Connections 选项卡。点击 New Connection 按钮。
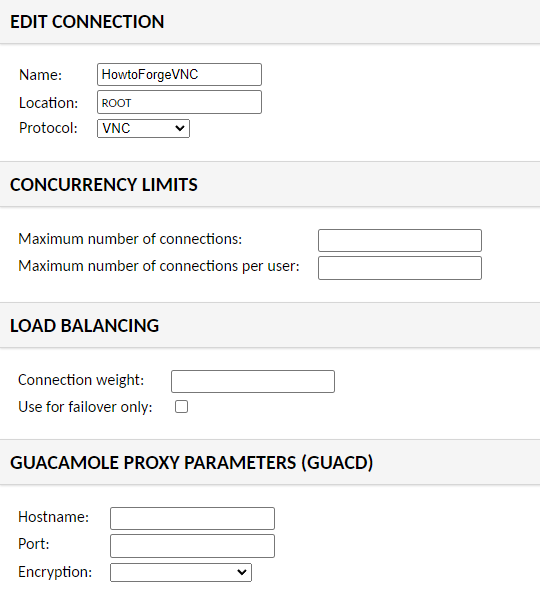
为您的连接选择一个名称,并从下拉菜单中选择 VNC。
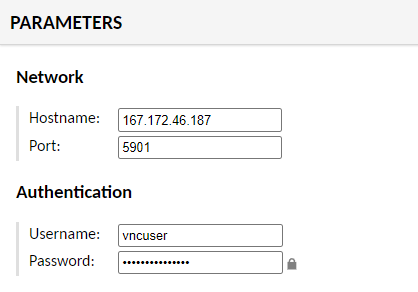
在 Parameters 部分,输入您服务器的 IP 地址(本例中为 167.172.46.187)作为主机名,并输入 5901 作为端口。在 Authentication 部分,输入您的 VNC 系统用户名和密码。
如果您想启用任何其他设置,请进行设置。点击 Save 完成连接的添加。
使用 VNC 访问您的计算机
访问 Guacamole dashboard,点击 All Connections 部分下的 VNC Connection。
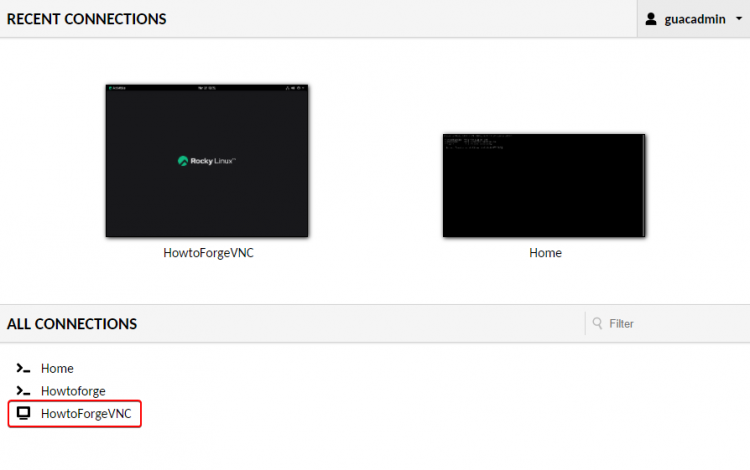
您将看到服务器的 Lock screen。
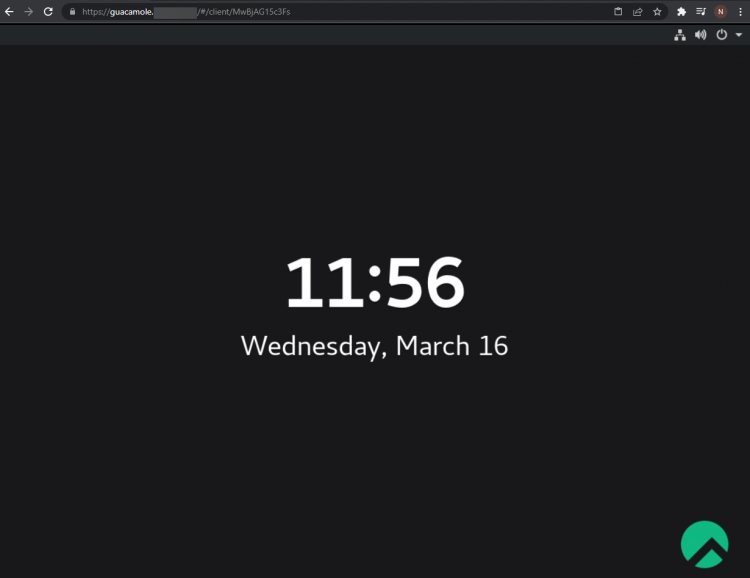
关闭它并输入您的 VNC 用户凭据。
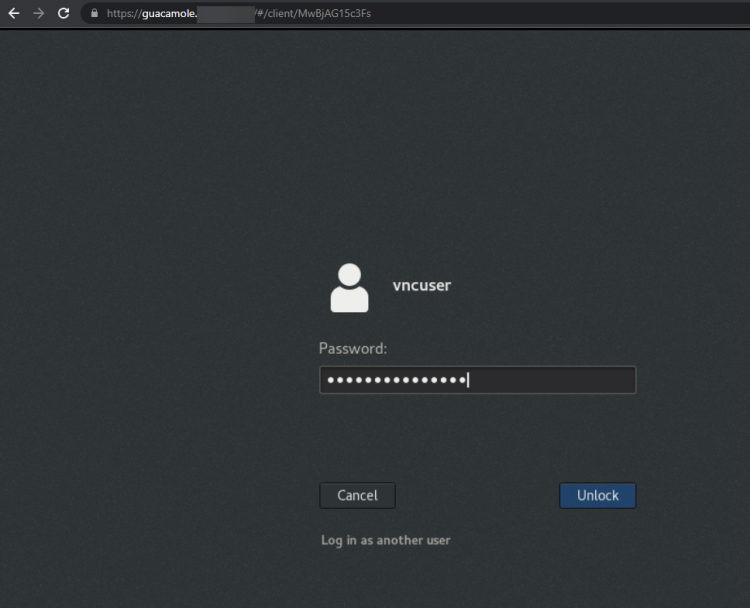
按 Unlock 按钮进入服务器/桌面主屏幕。
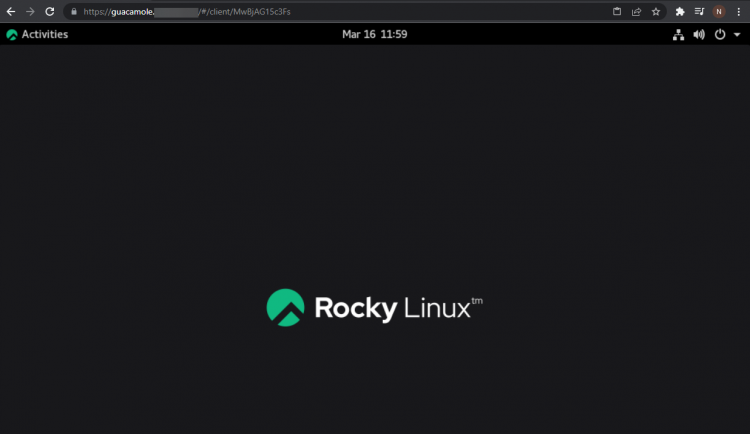
您就可以开始在计算机上工作了。
第 8 步:创建到远程 Ubuntu/Debian 服务器的 VNC 连接
如果您的 Guacamole 安装与桌面环境位于同一台服务器上,可以使用上述步骤访问您服务器的 VNC。我们的 Rocky Linux 安装位于同一台服务器上,但 Ubuntu 环境位于另一台服务器上。在这种情况下,我们将使用 SSH 隧道来创建到该服务器的 VNC 连接,因为这是一种更安全的方法。
打开您的 Guacamole URL,输入凭据进行登录。
访问 Guacamole Settings 下的 Connections 选项卡。点击 New Connection 按钮。
为您的连接选择一个名称,并从下拉菜单中选择 VNC。
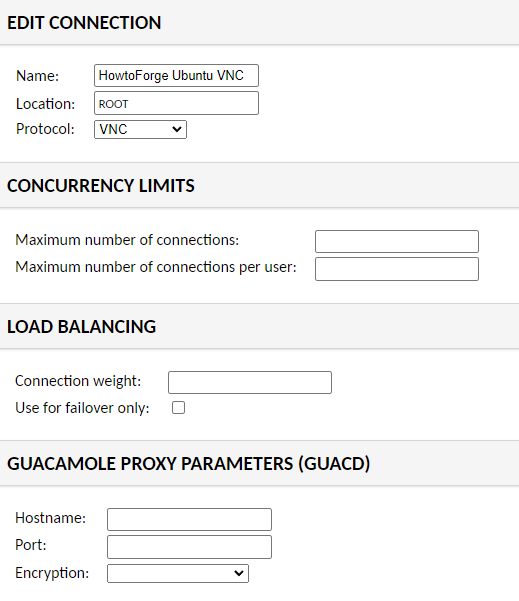
在 Parameters 部分,输入 localhost 地址作为主机名,并输入 5001 作为端口。将 Authentication 部分留空,因为我们将在下一步使用它。稍后我们还会说明为什么使用 localhost 作为主机。
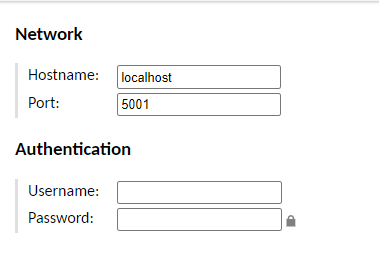
如果您想启用任何其他设置,请进行设置。点击 Save 完成连接的添加。
创建 SSH 隧道
在托管 Guacamole 的服务器的终端中运行以下命令。
$ ssh -L 5001:localhost:5901
[email protected]
让我们来看看这里发生了什么。上述命令使用本地端口转发将您系统的 SSH 连接转发到远程服务器。
- -L 标志指定本地端口转发。
- 5001 端口是您的 Guacamole 机器上用于访问远程服务器的端口。如果需要,您可以选择其他端口。
- localhost:5901 是要连接的远程 VNC 服务器以及显示编号(及其对应的端口号)。由于我们正在进行本地端口转发,远程服务器地址会被转换为 localhost。
- [email protected] 在本例中是我们所访问的远程 Ubuntu / Debian 服务器的 SSH 用户和 IP 地址。
只要该命令在运行,SSH 隧道就会保持打开。在终端中输入 exit 以退出隧道并关闭 VNC 连接。
使用 VNC 访问您的计算机
访问 Guacamole dashboard,点击 All Connections 部分下的 VNC Connection。
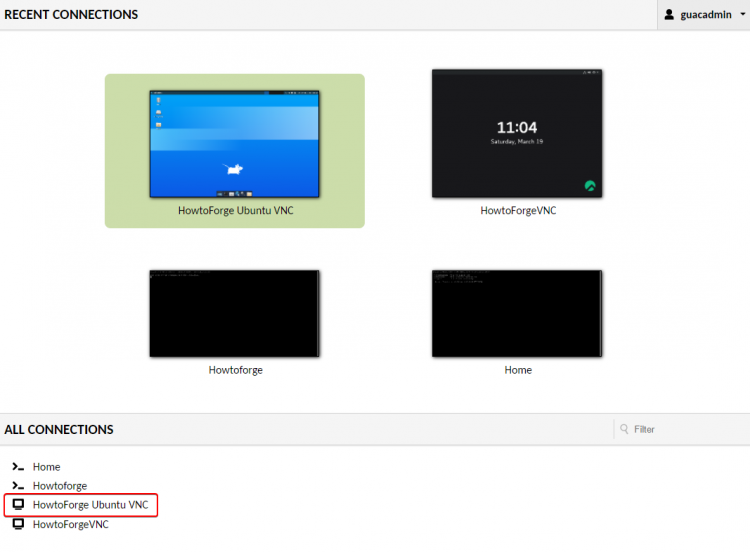
您将看到一个密码提示,要求输入您使用 vncpasswd 命令设置的 VNC 密码。输入密码并按 Continue 继续。
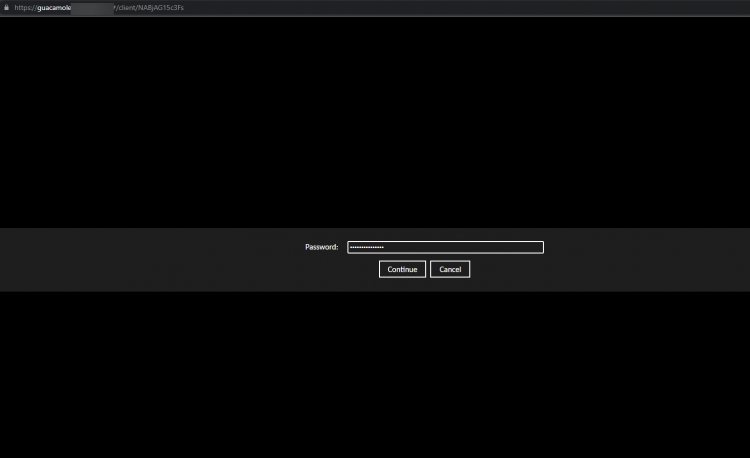
确认成功后,您将进入系统的桌面屏幕。
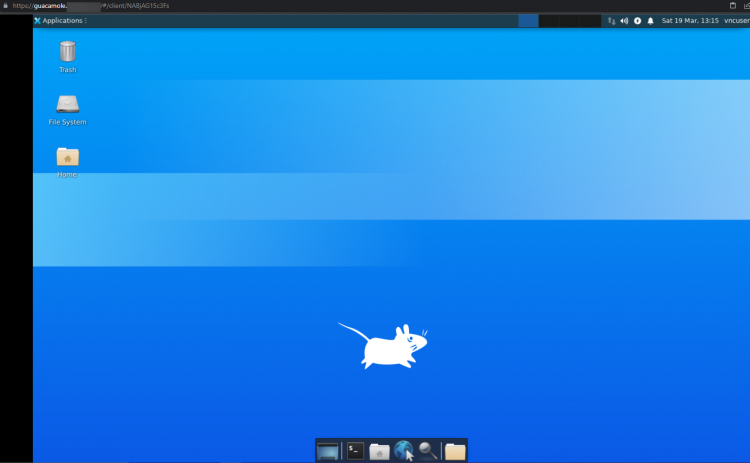
您就可以开始在计算机上工作了。
结论
关于使用 Apache Guacamole 与 Linux 服务器创建 VNC 连接的教程到此结束。如果您有任何问题,请在下方评论中提出。